
James Kitchens
May 31, 2025
Hiking
Photography
Cherry Creek winds its way through the polished granite domes of Emigrant Wilderness, just northwest of Yosemite National Park. In late spring, clear blue snow melt water from the high peaks to the northeast is funneled through the canyon as it descends to Cherry Lake. By autumn, the creek dries up nearly completely and becomes a series of divided pools. It is well-known in the whitewater kayaking community as one of the premiere California multi-day whitewater kayaking trips where expert paddlers can push their skills on its many difficult rapids. The river culminates in the Cherry Bomb Gorge, a spectacularly narrow section of waterfalls that is closed in by high walls on either side. I’ve wanted to see this gorge myself ever since watching the (now old) kayaking film “High Sierra Safety” by Gareth Tate back during high school, but having not kayaked in many years I figured that dream was long past. Luckily now that I live in California, I’ve come to realize that many of the creeks that I watched in kayaking videos are now just a short drive away and with some creative route finding, I MIGHT be able to backpack into these gorges. I emphasize MIGHT because I’ve not always been terribly successful; in May 2023, Margaret and I tried to hike into Wabena Falls in the Royal Gorge of the North Fork of the American River and ended up turning around without seeing the falls as I had greatly overestimated how fast we were able to move along the river bank (this will be a somewhat repeated trend here as well).
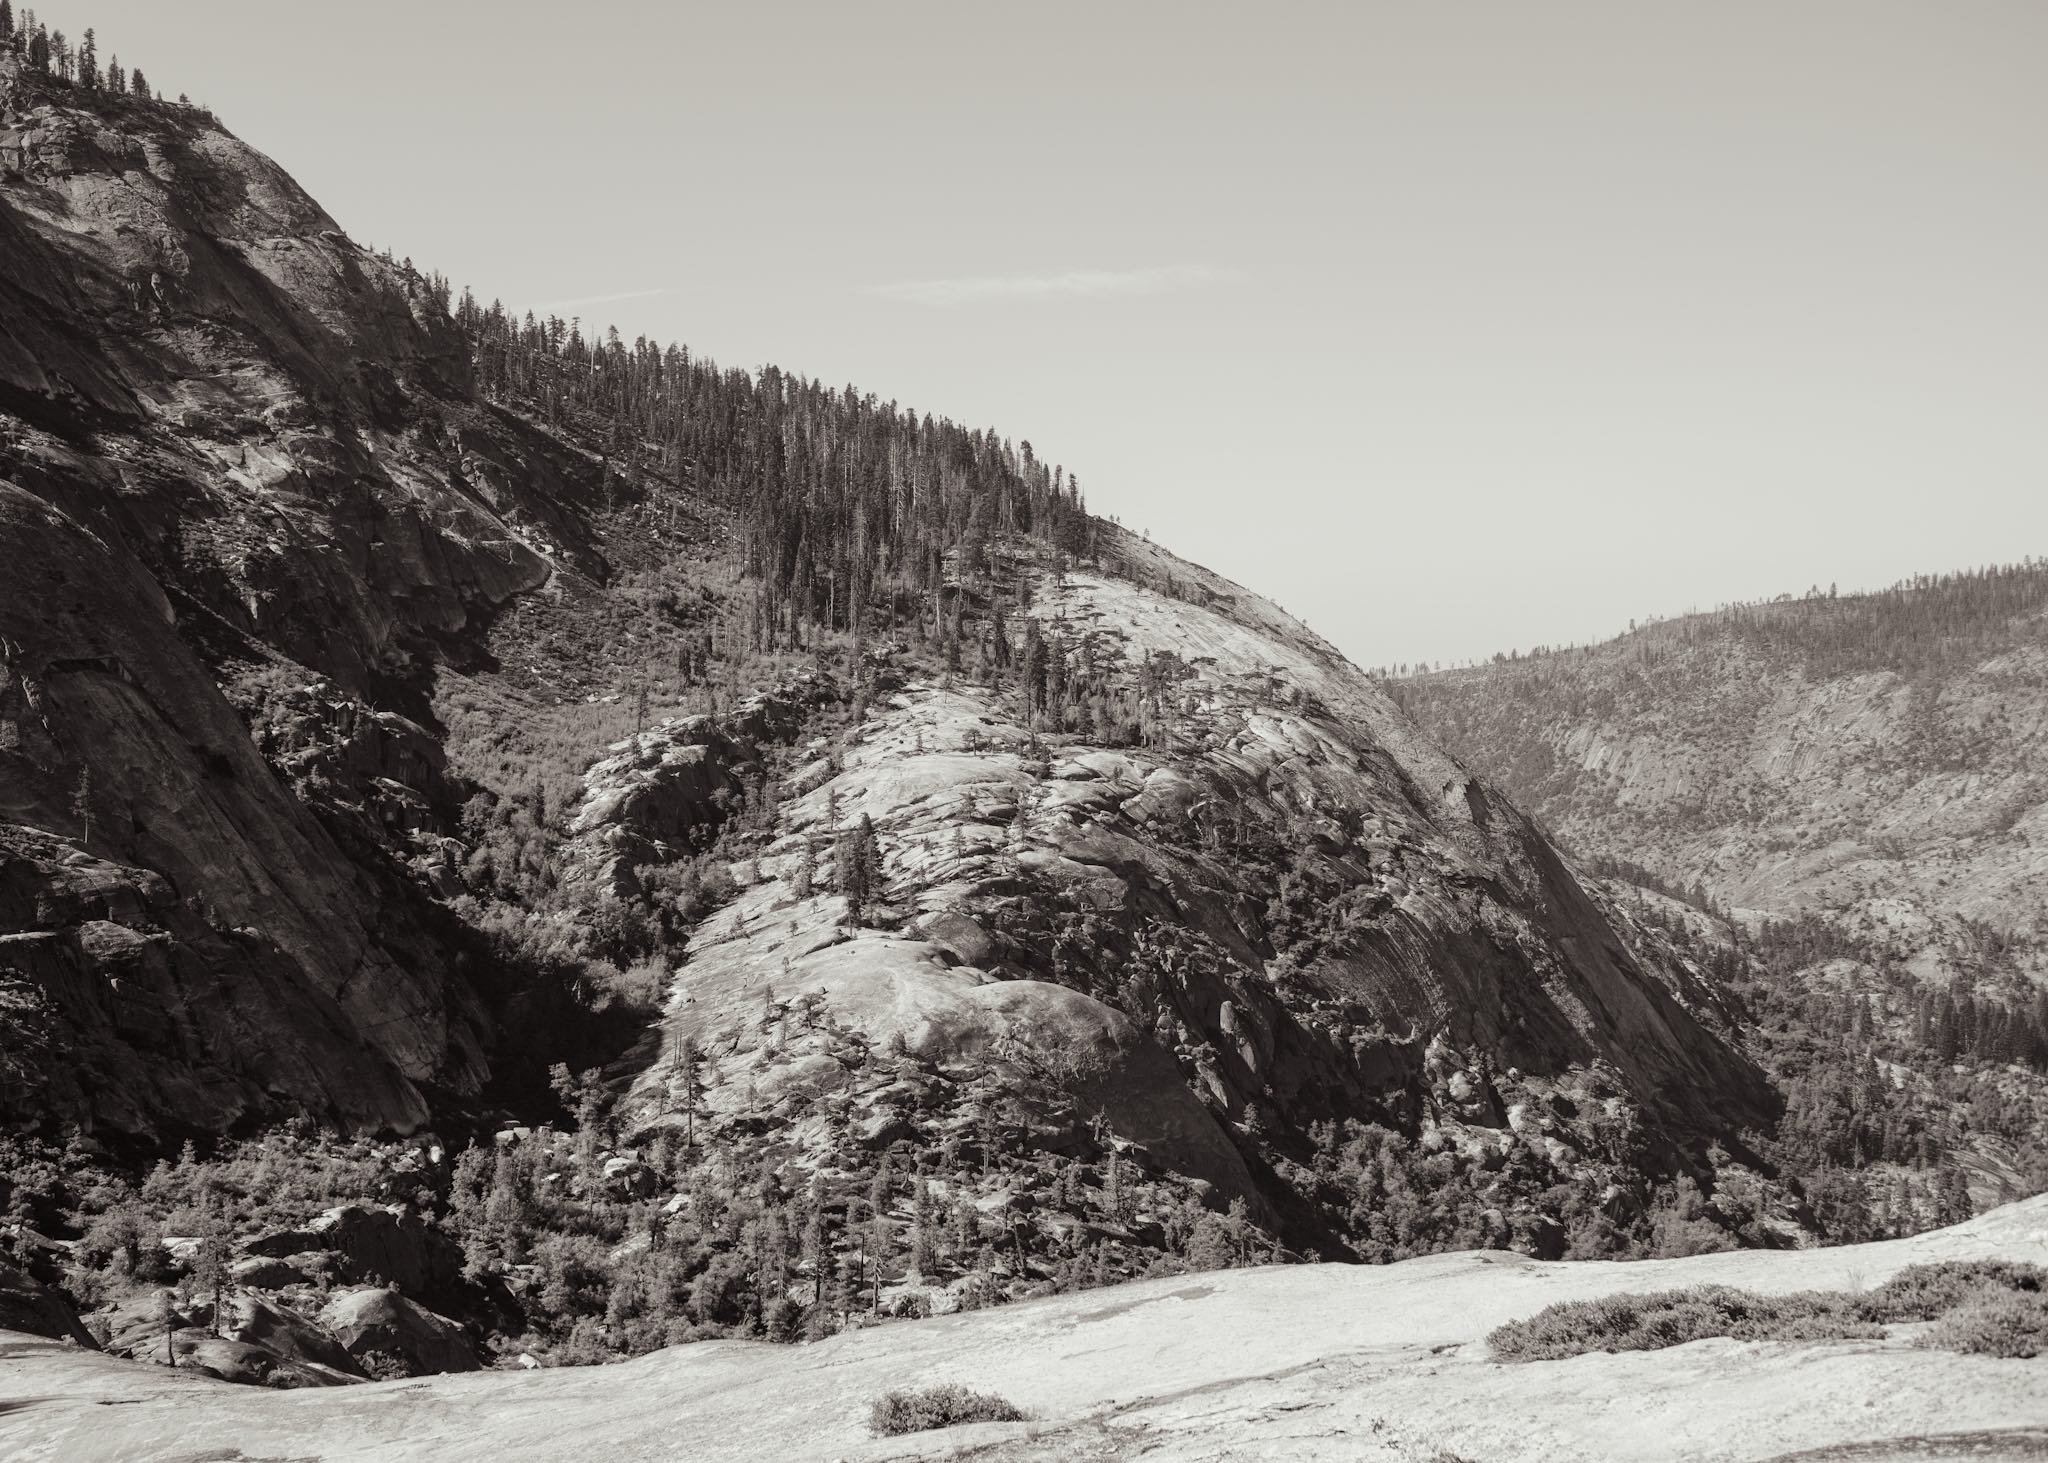
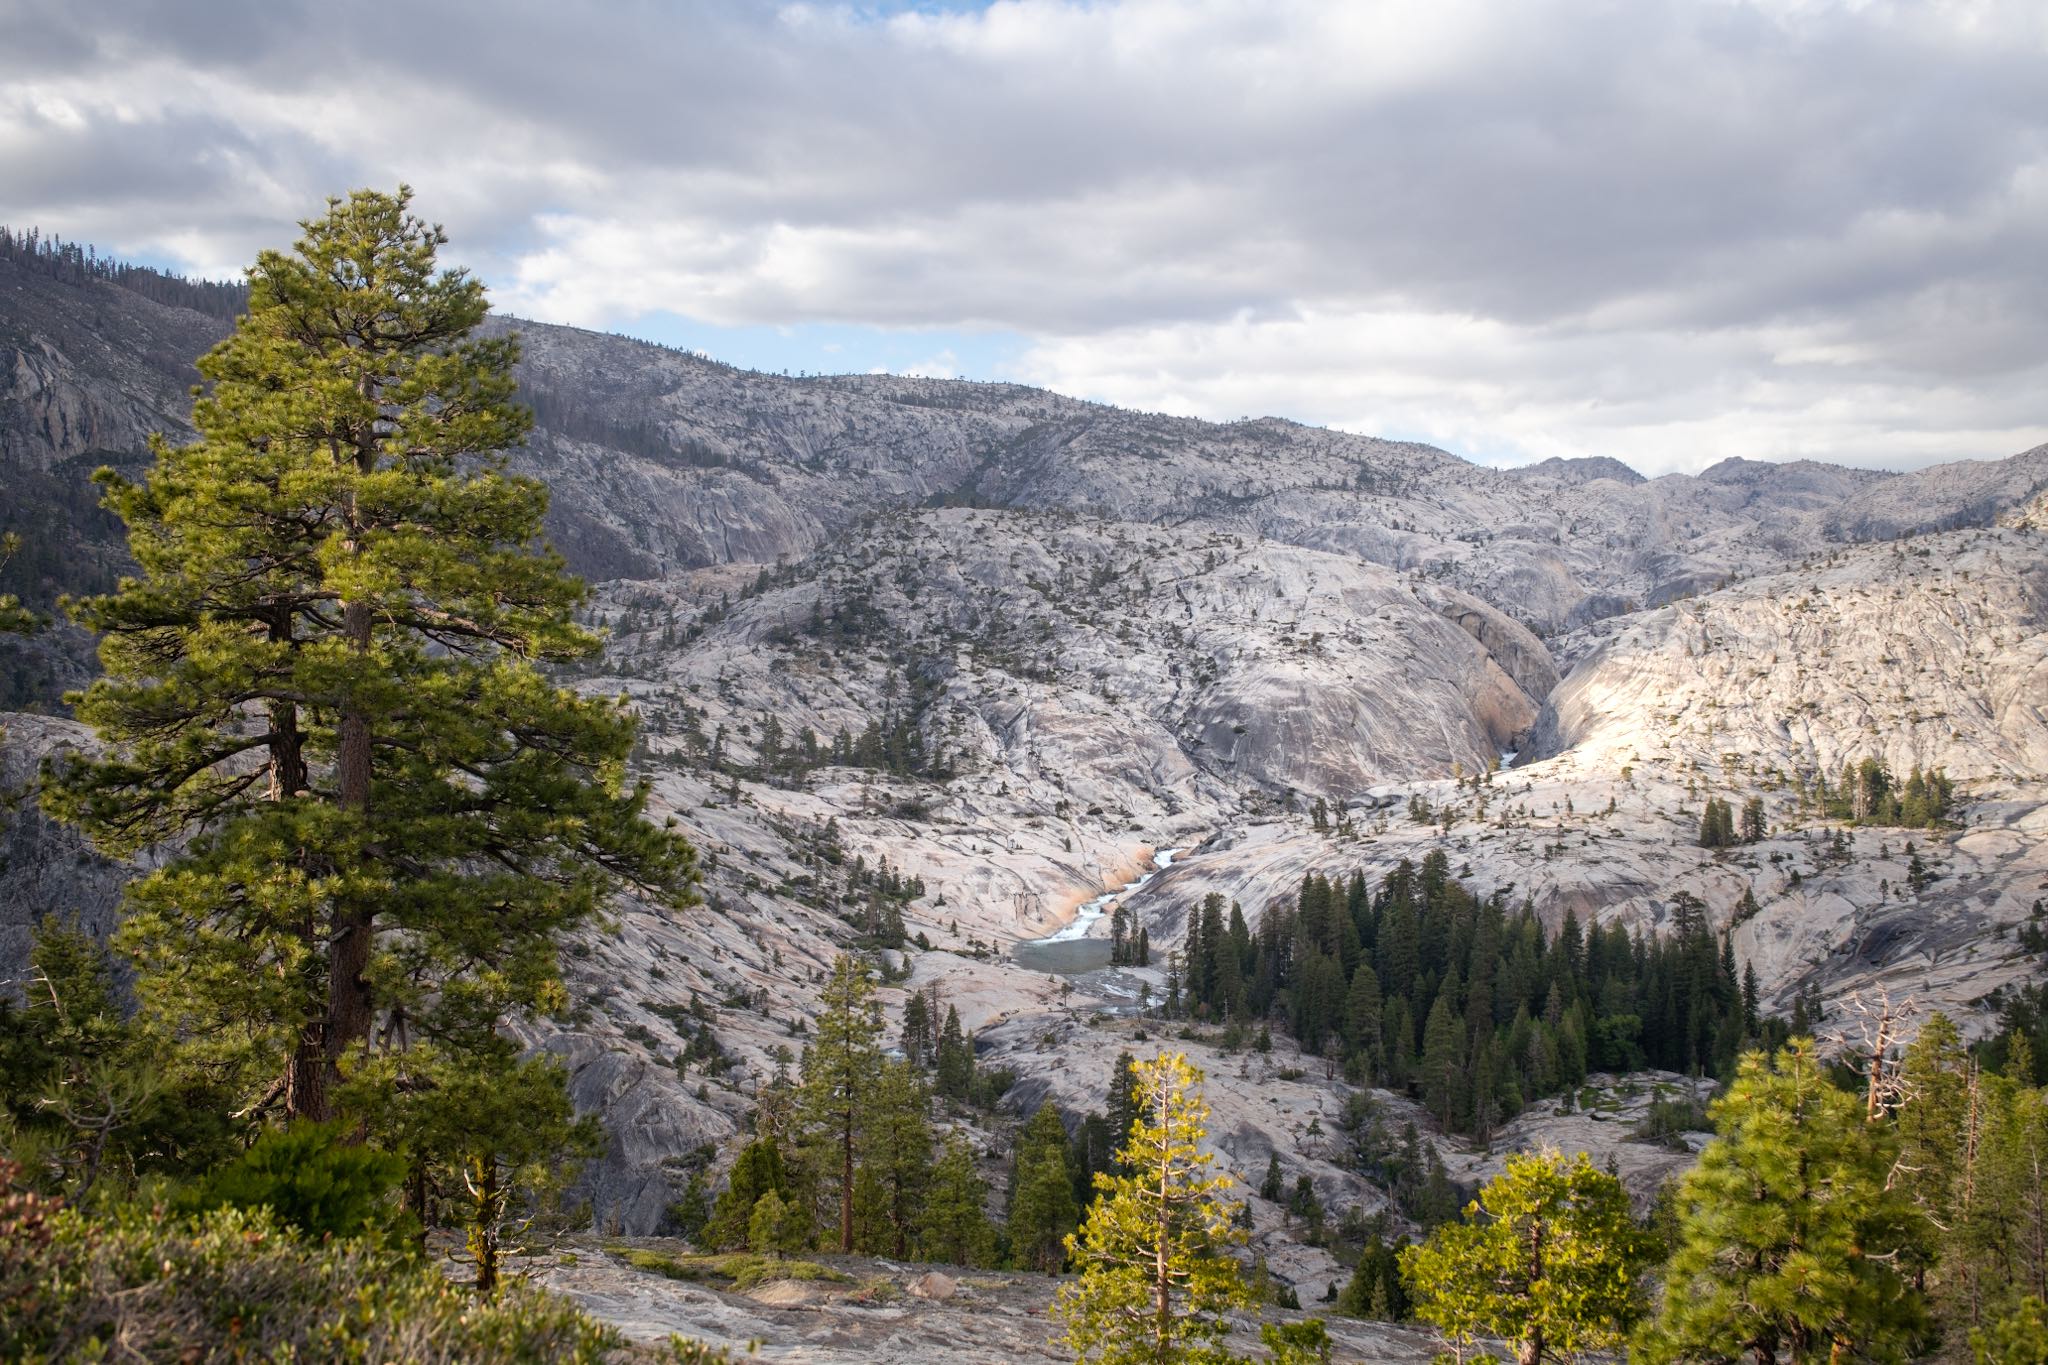
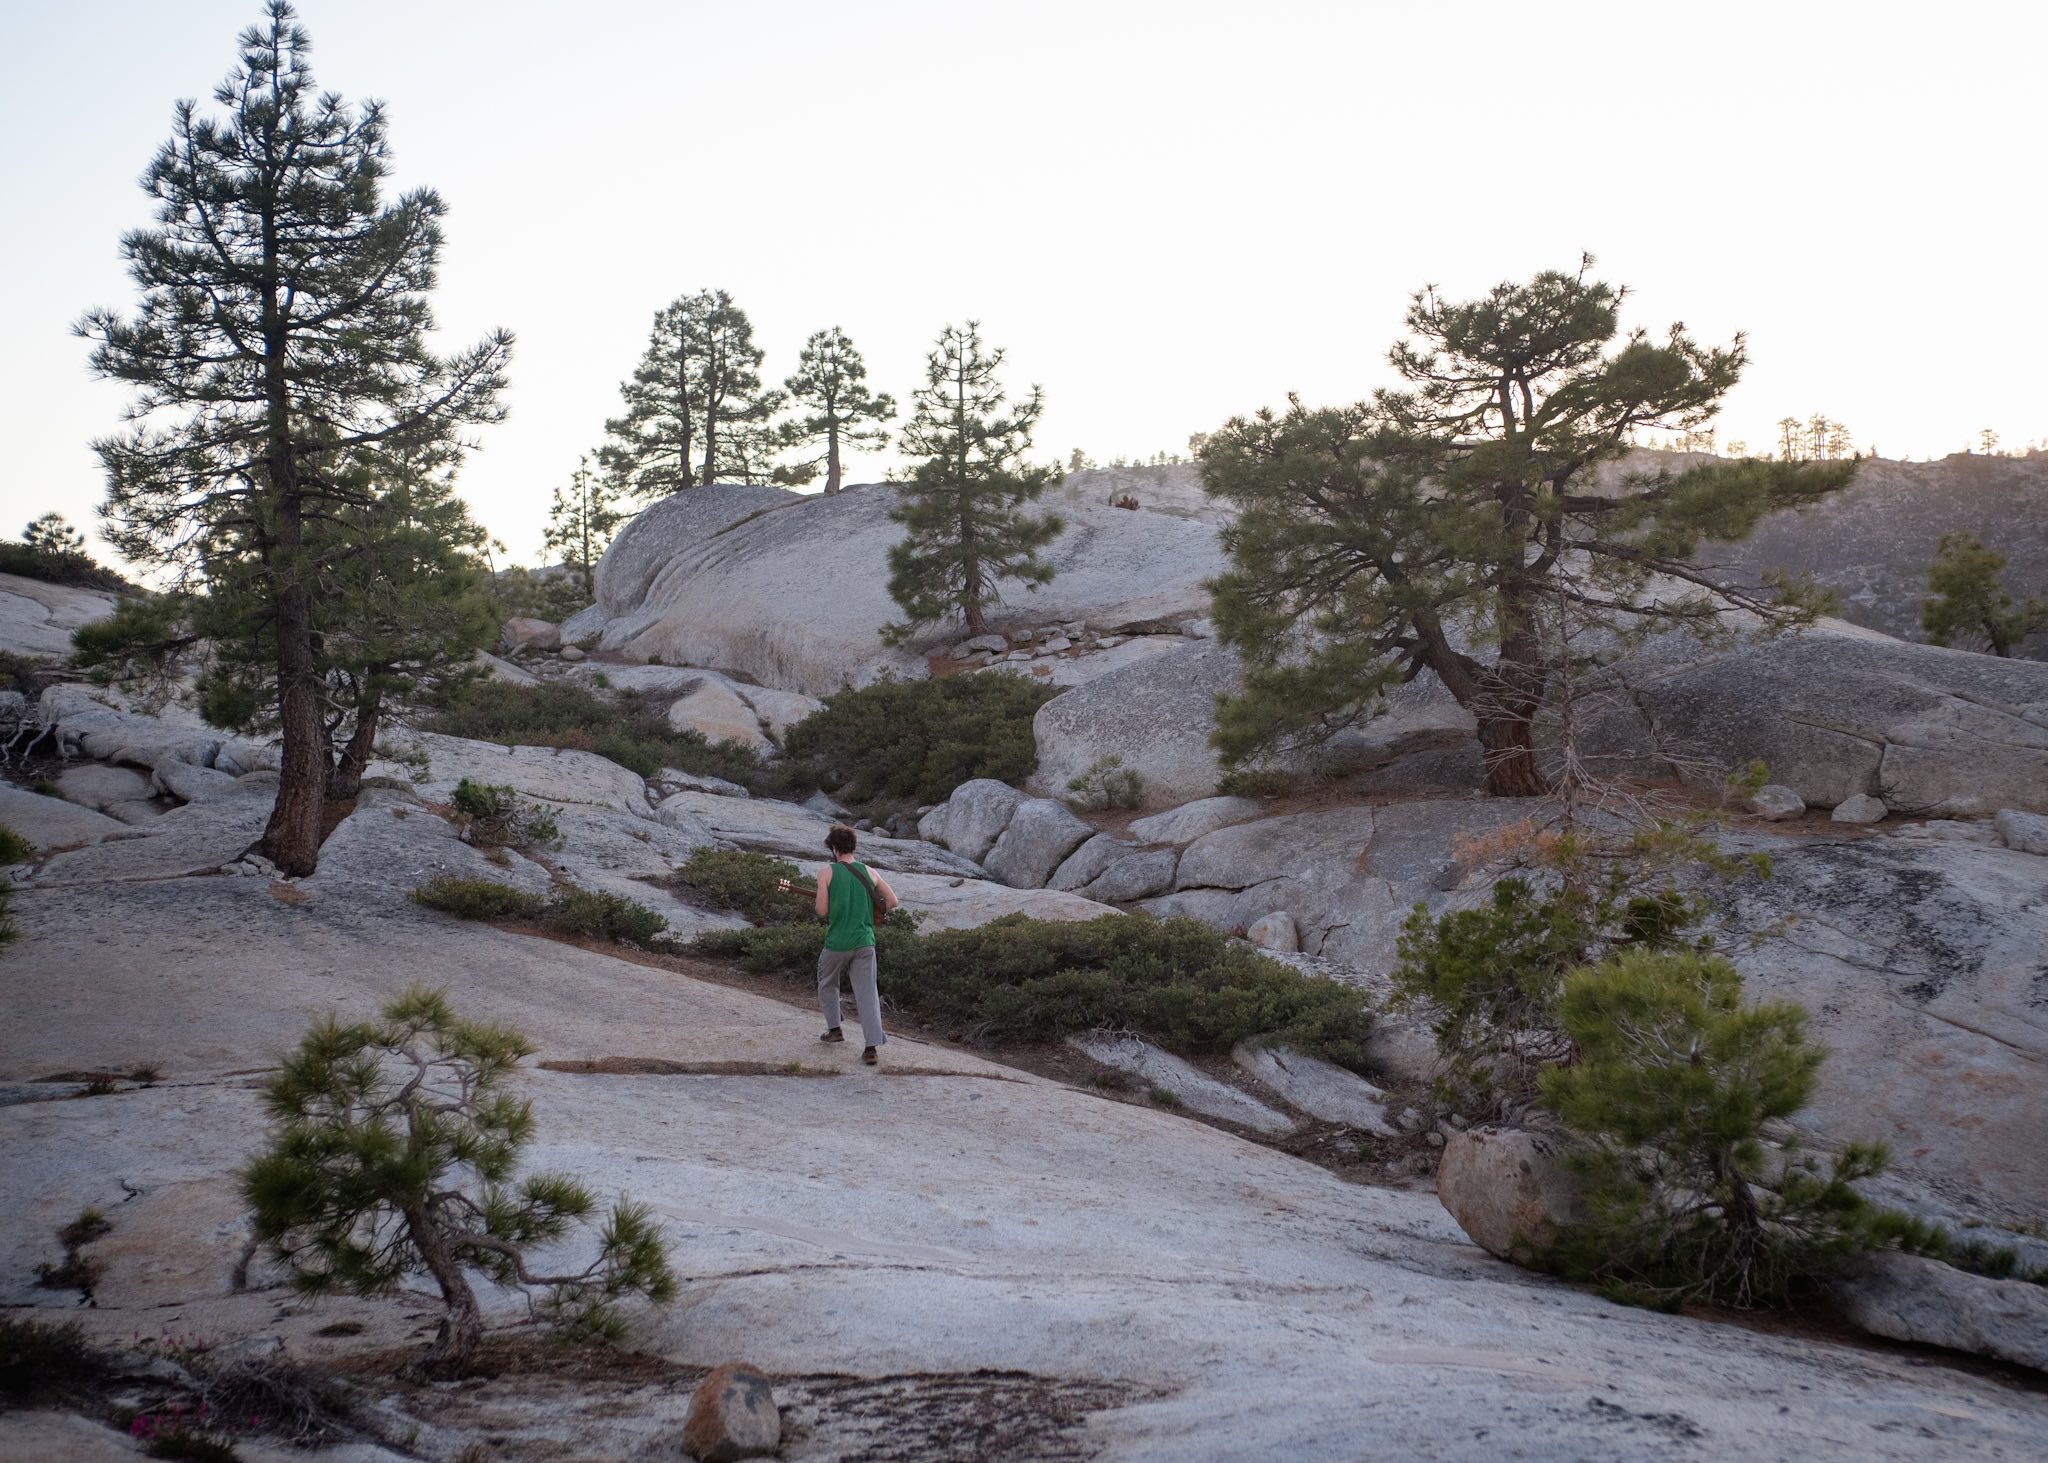
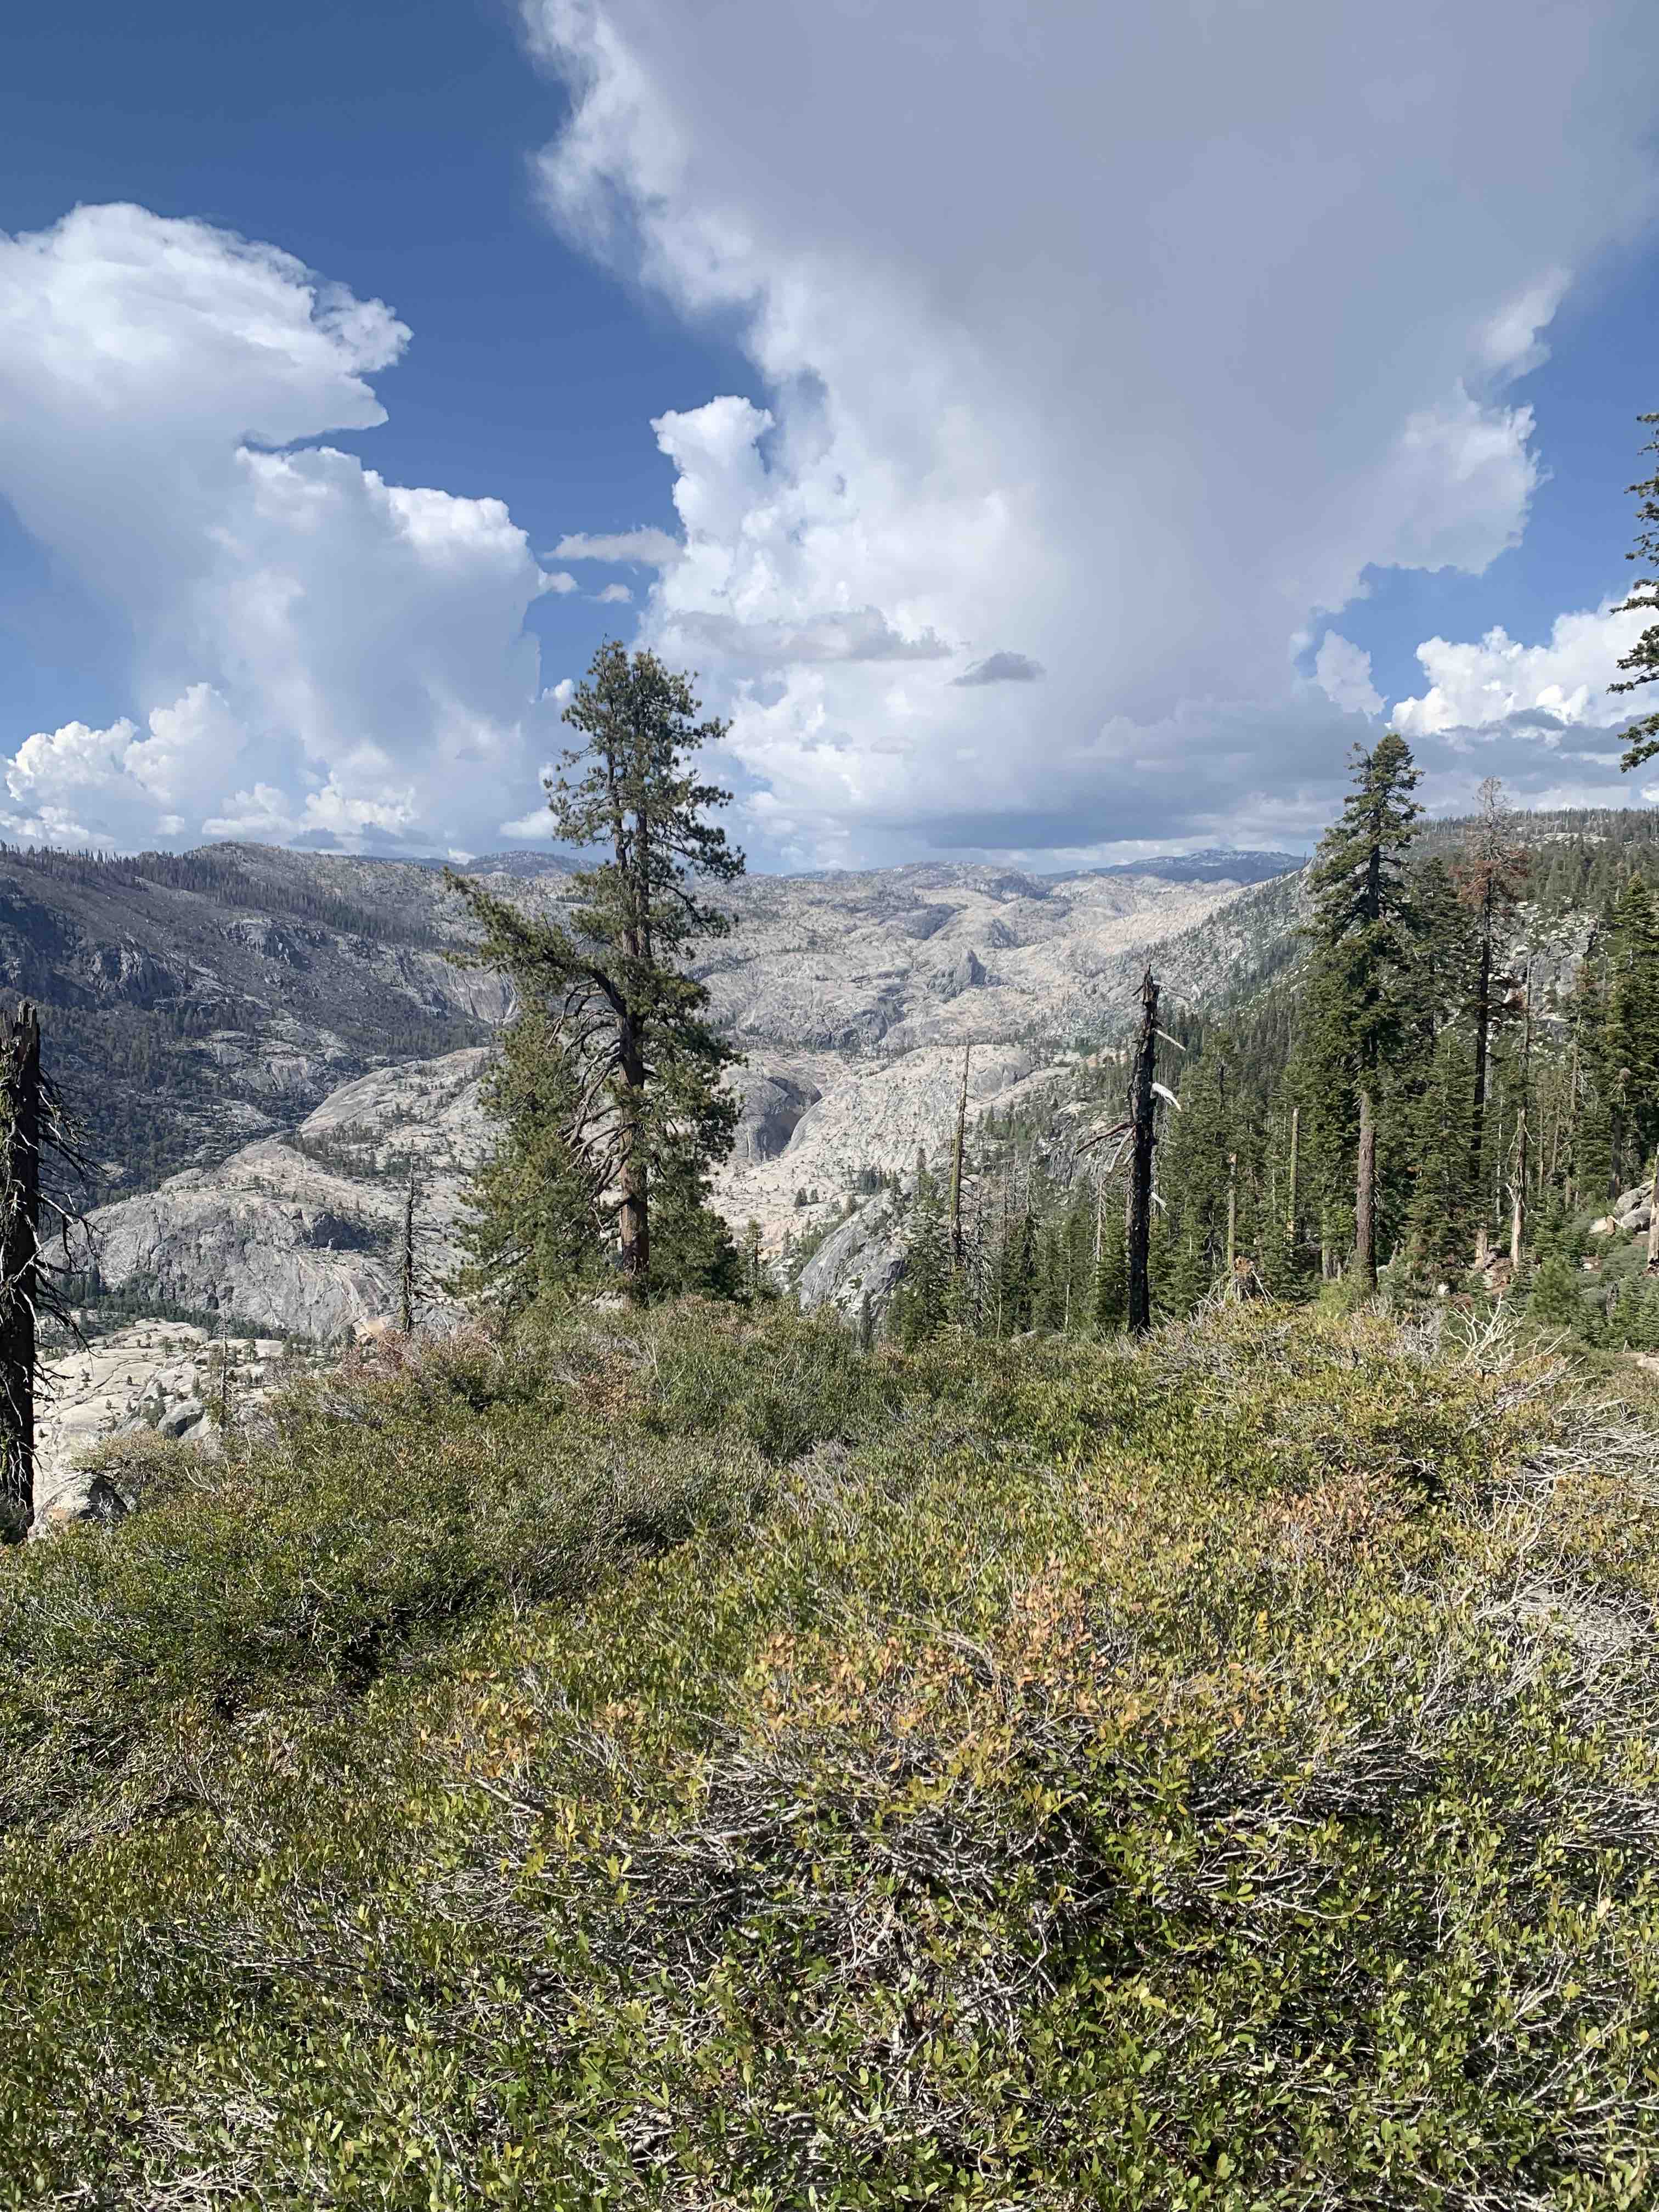
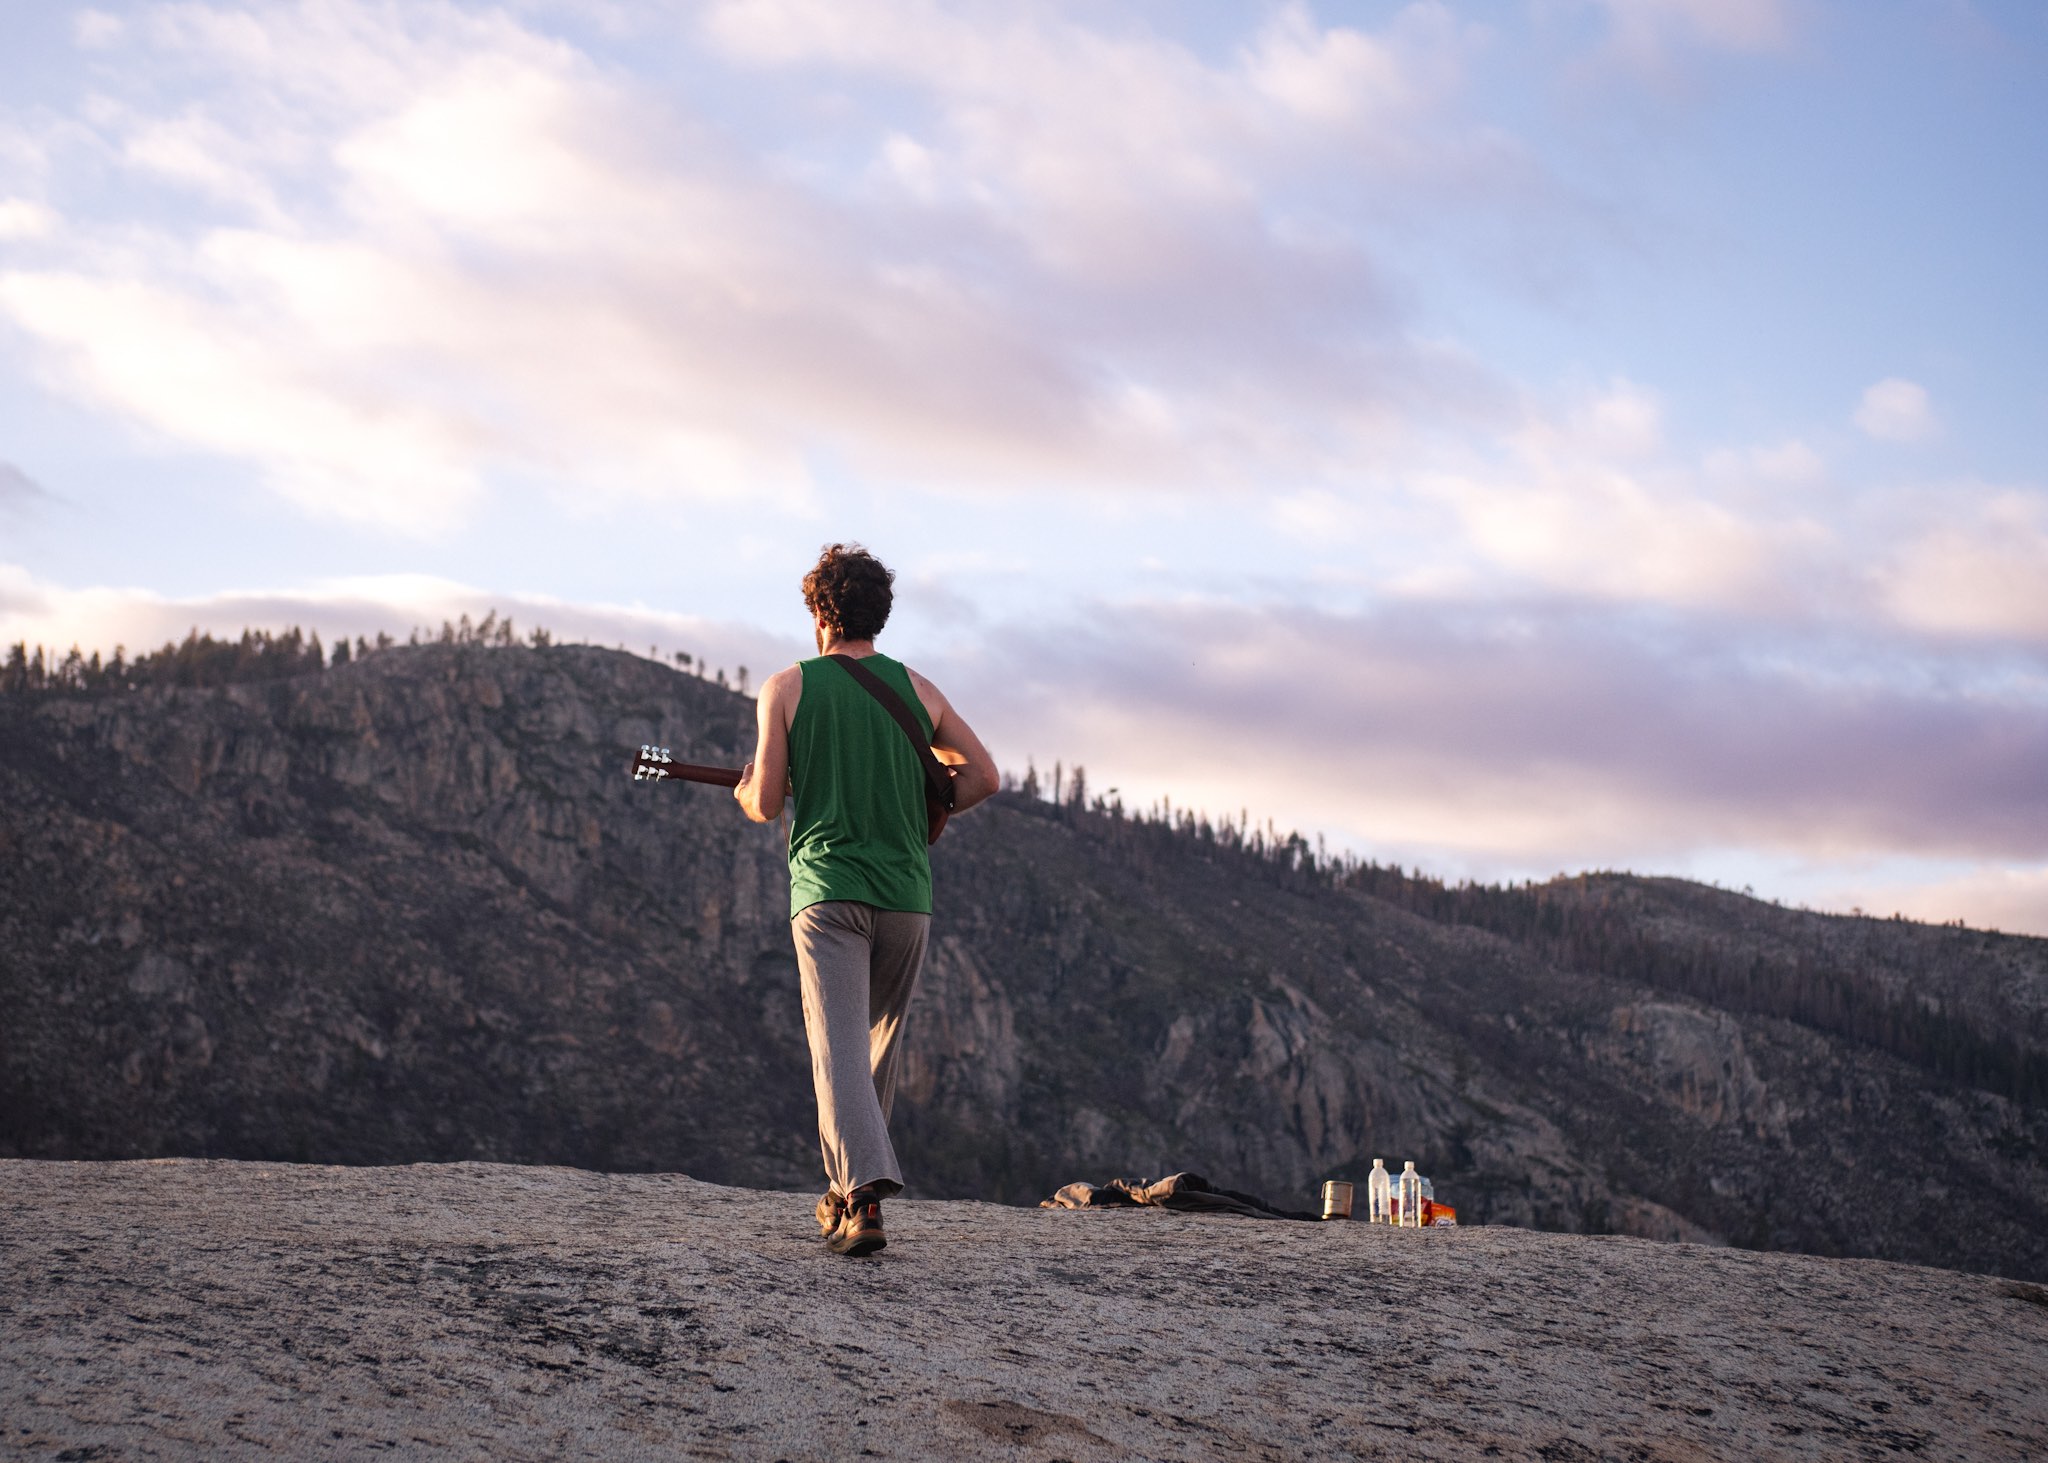
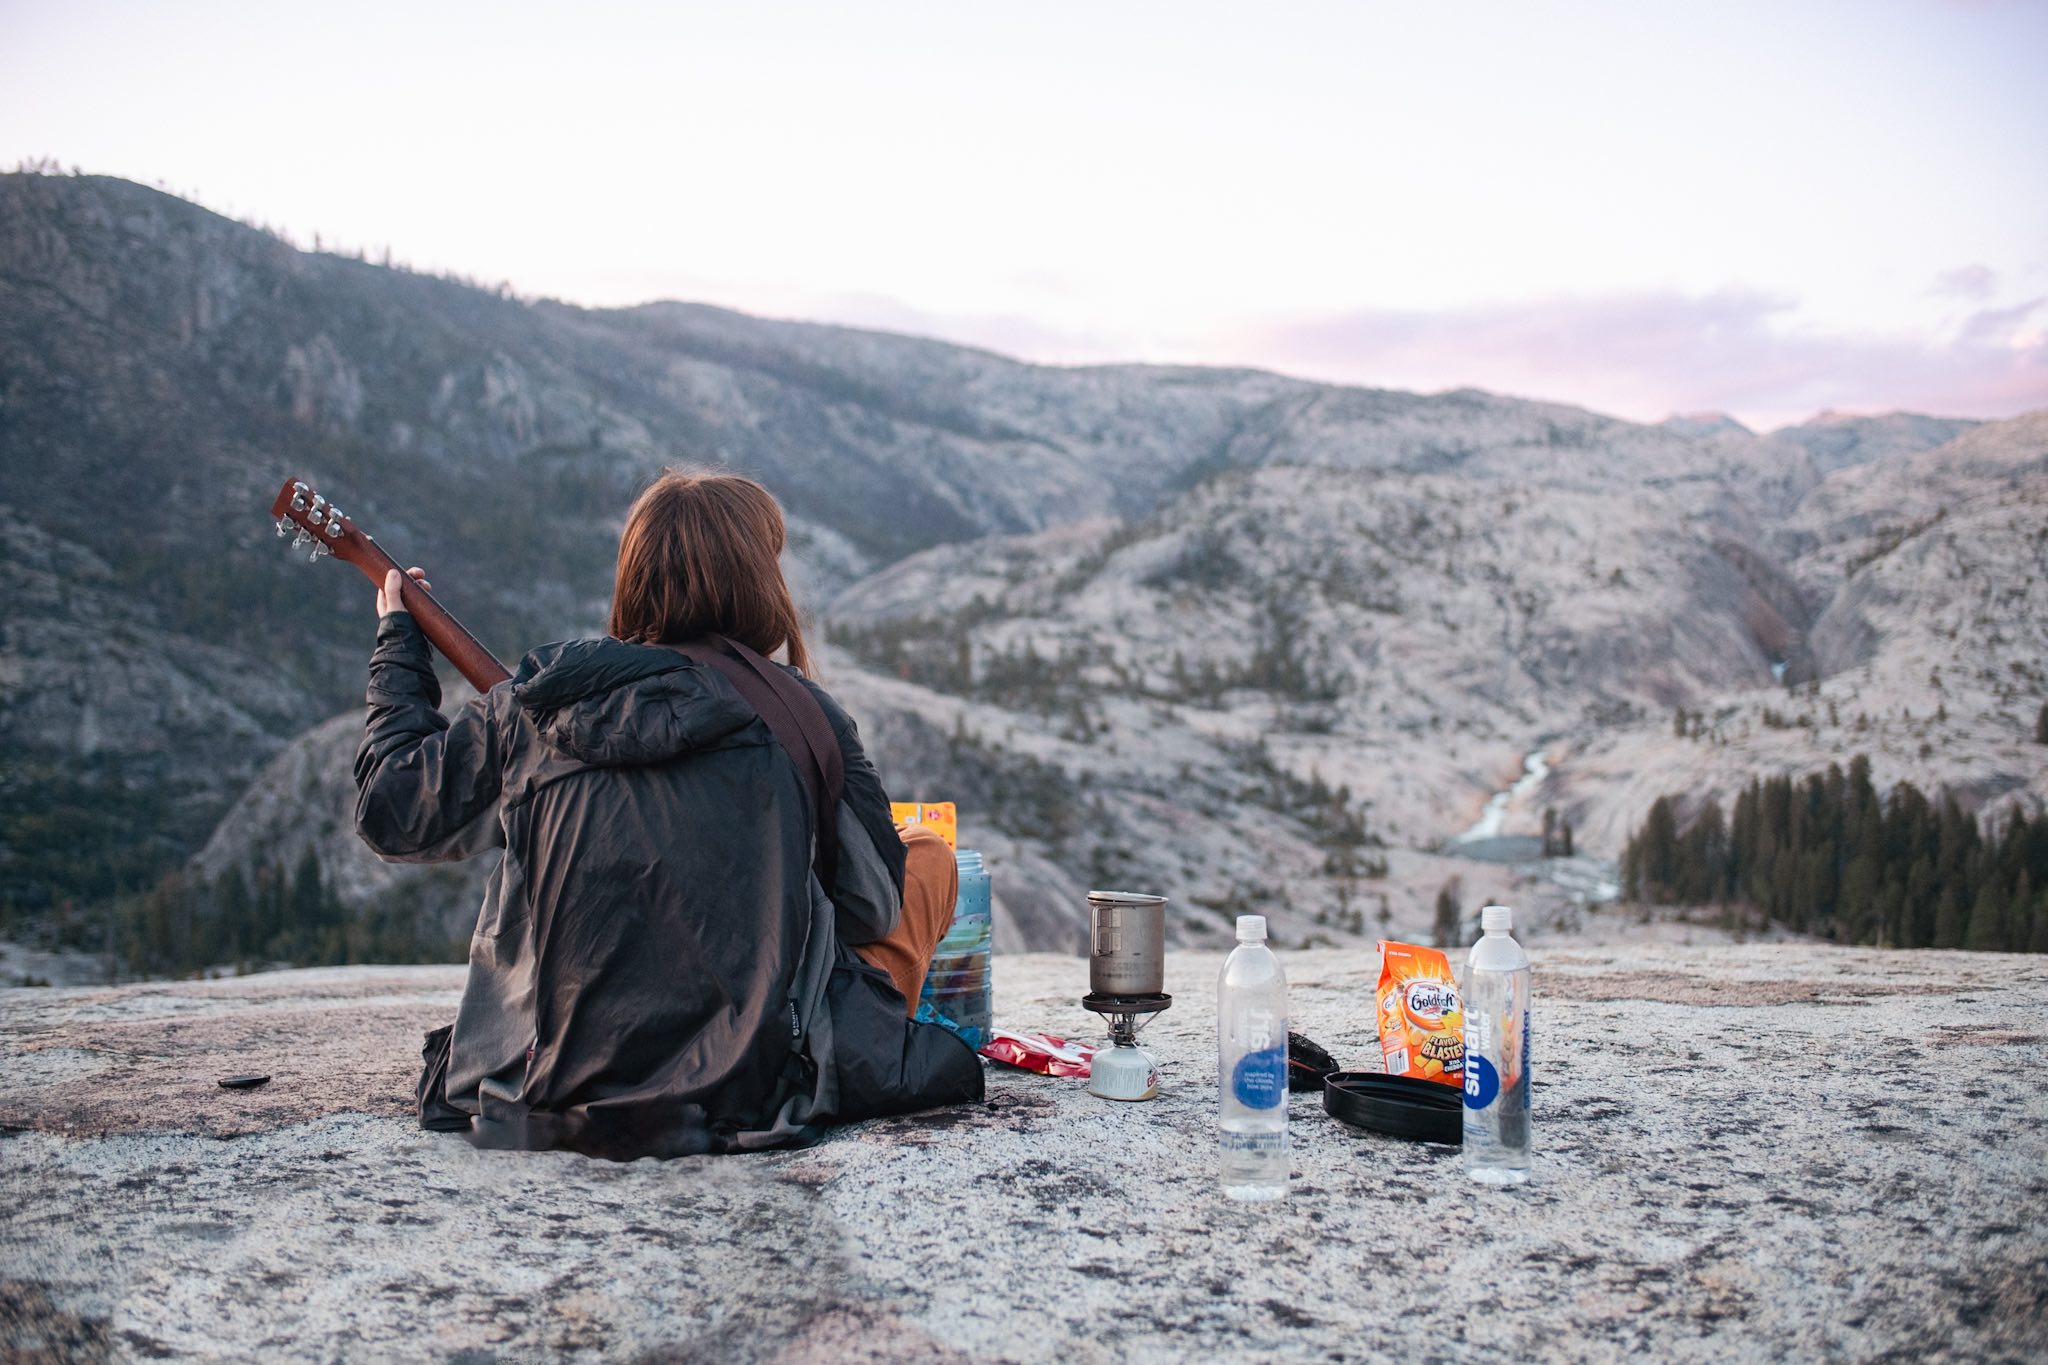
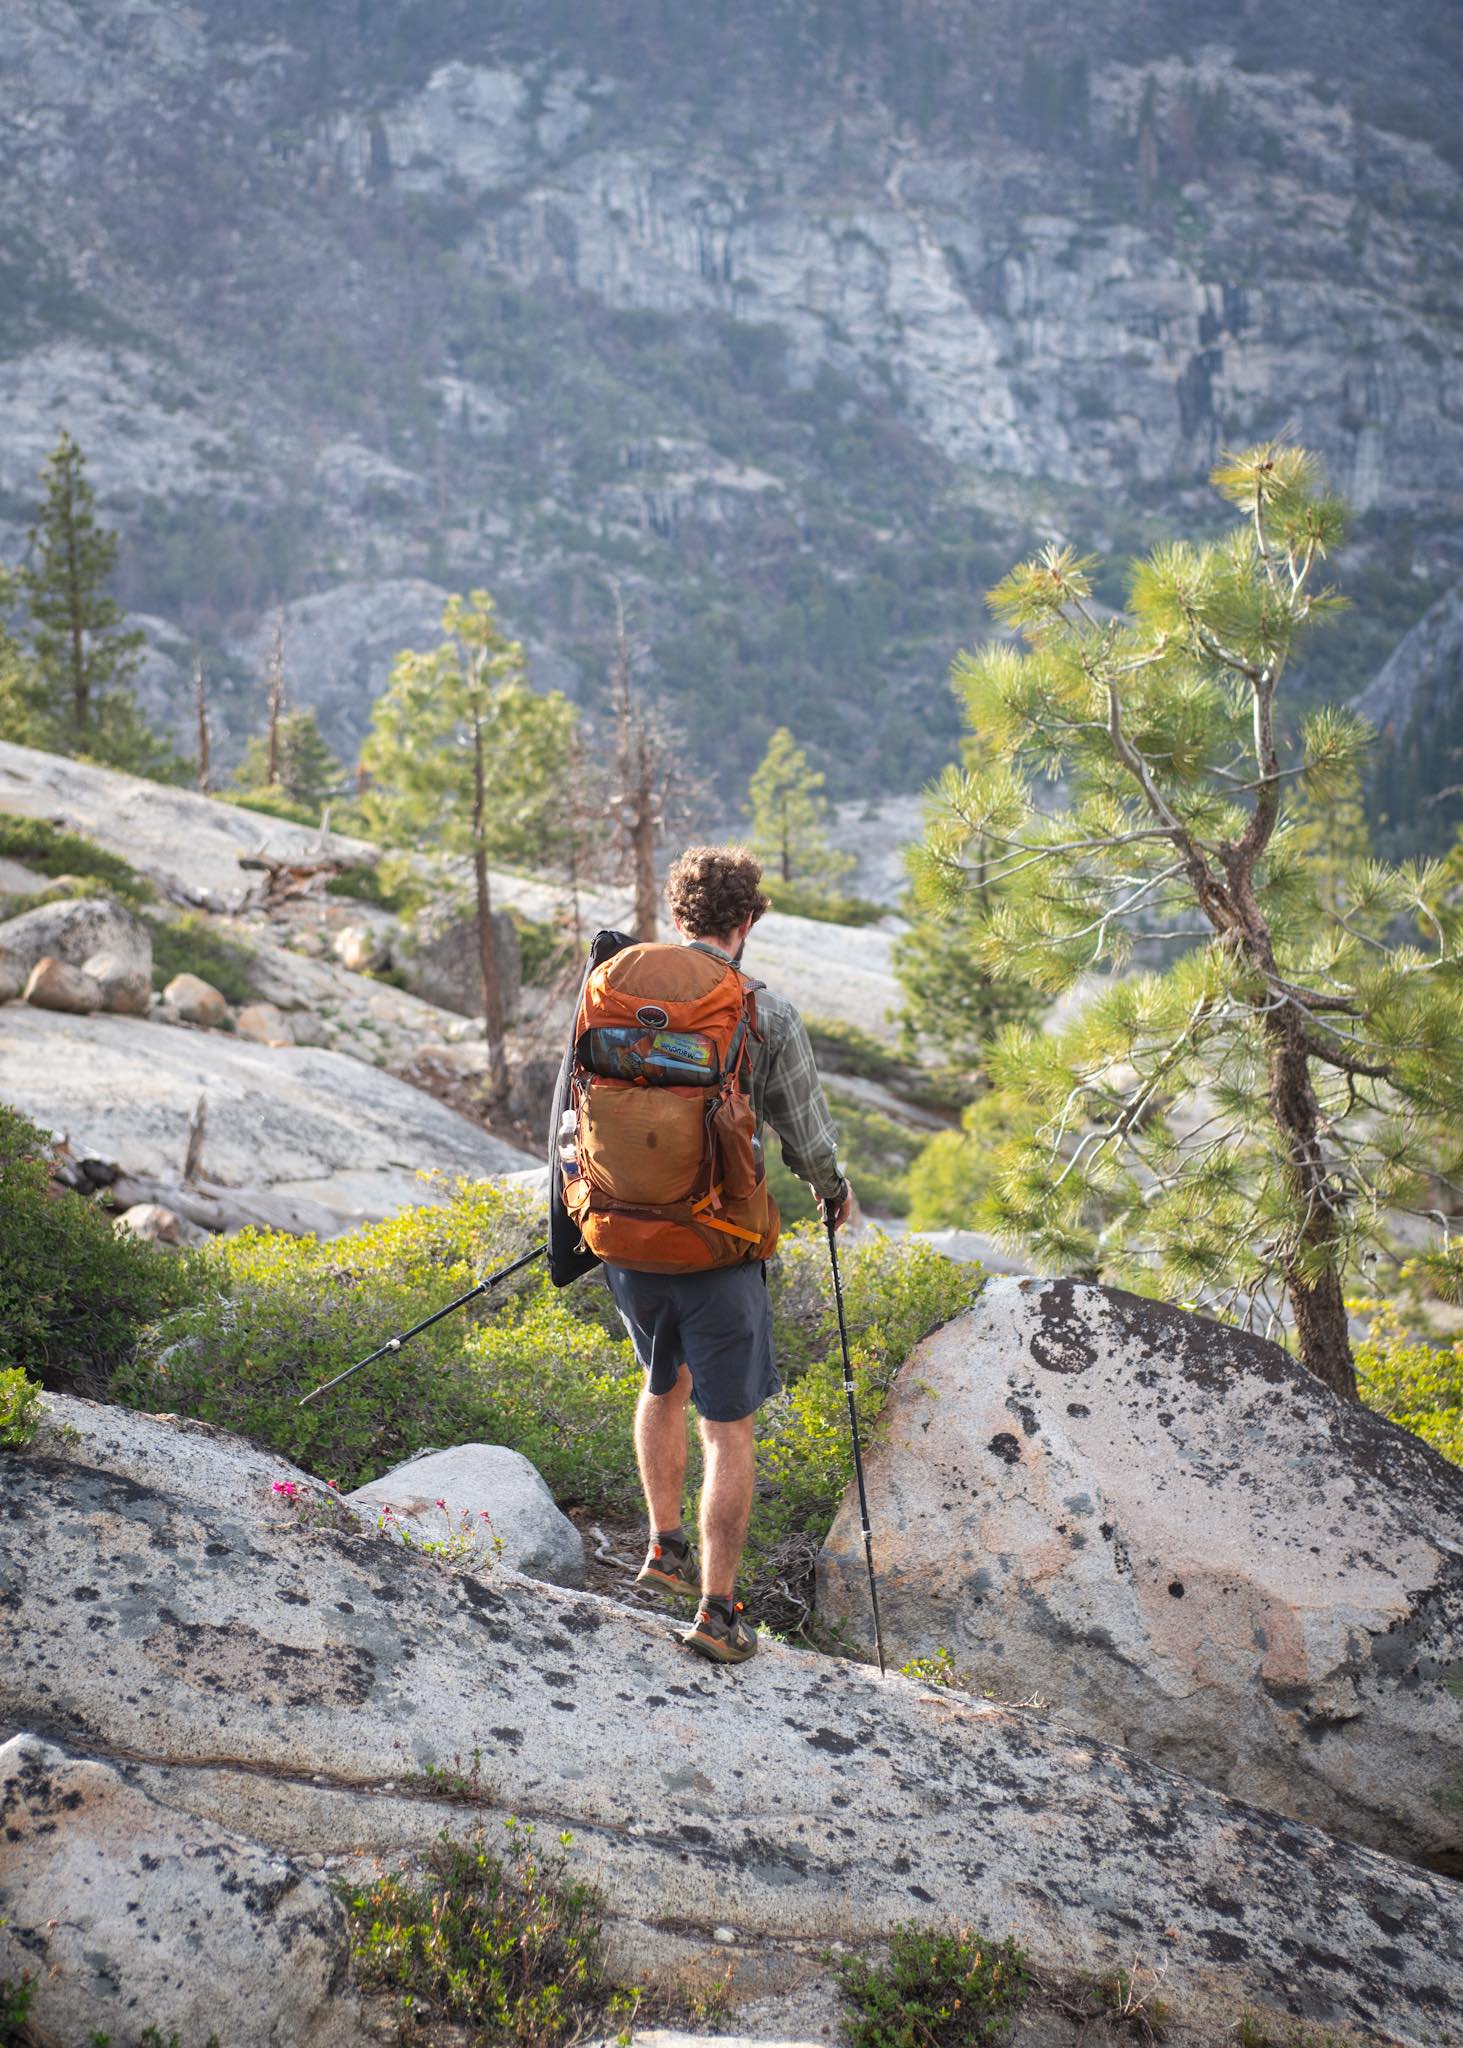
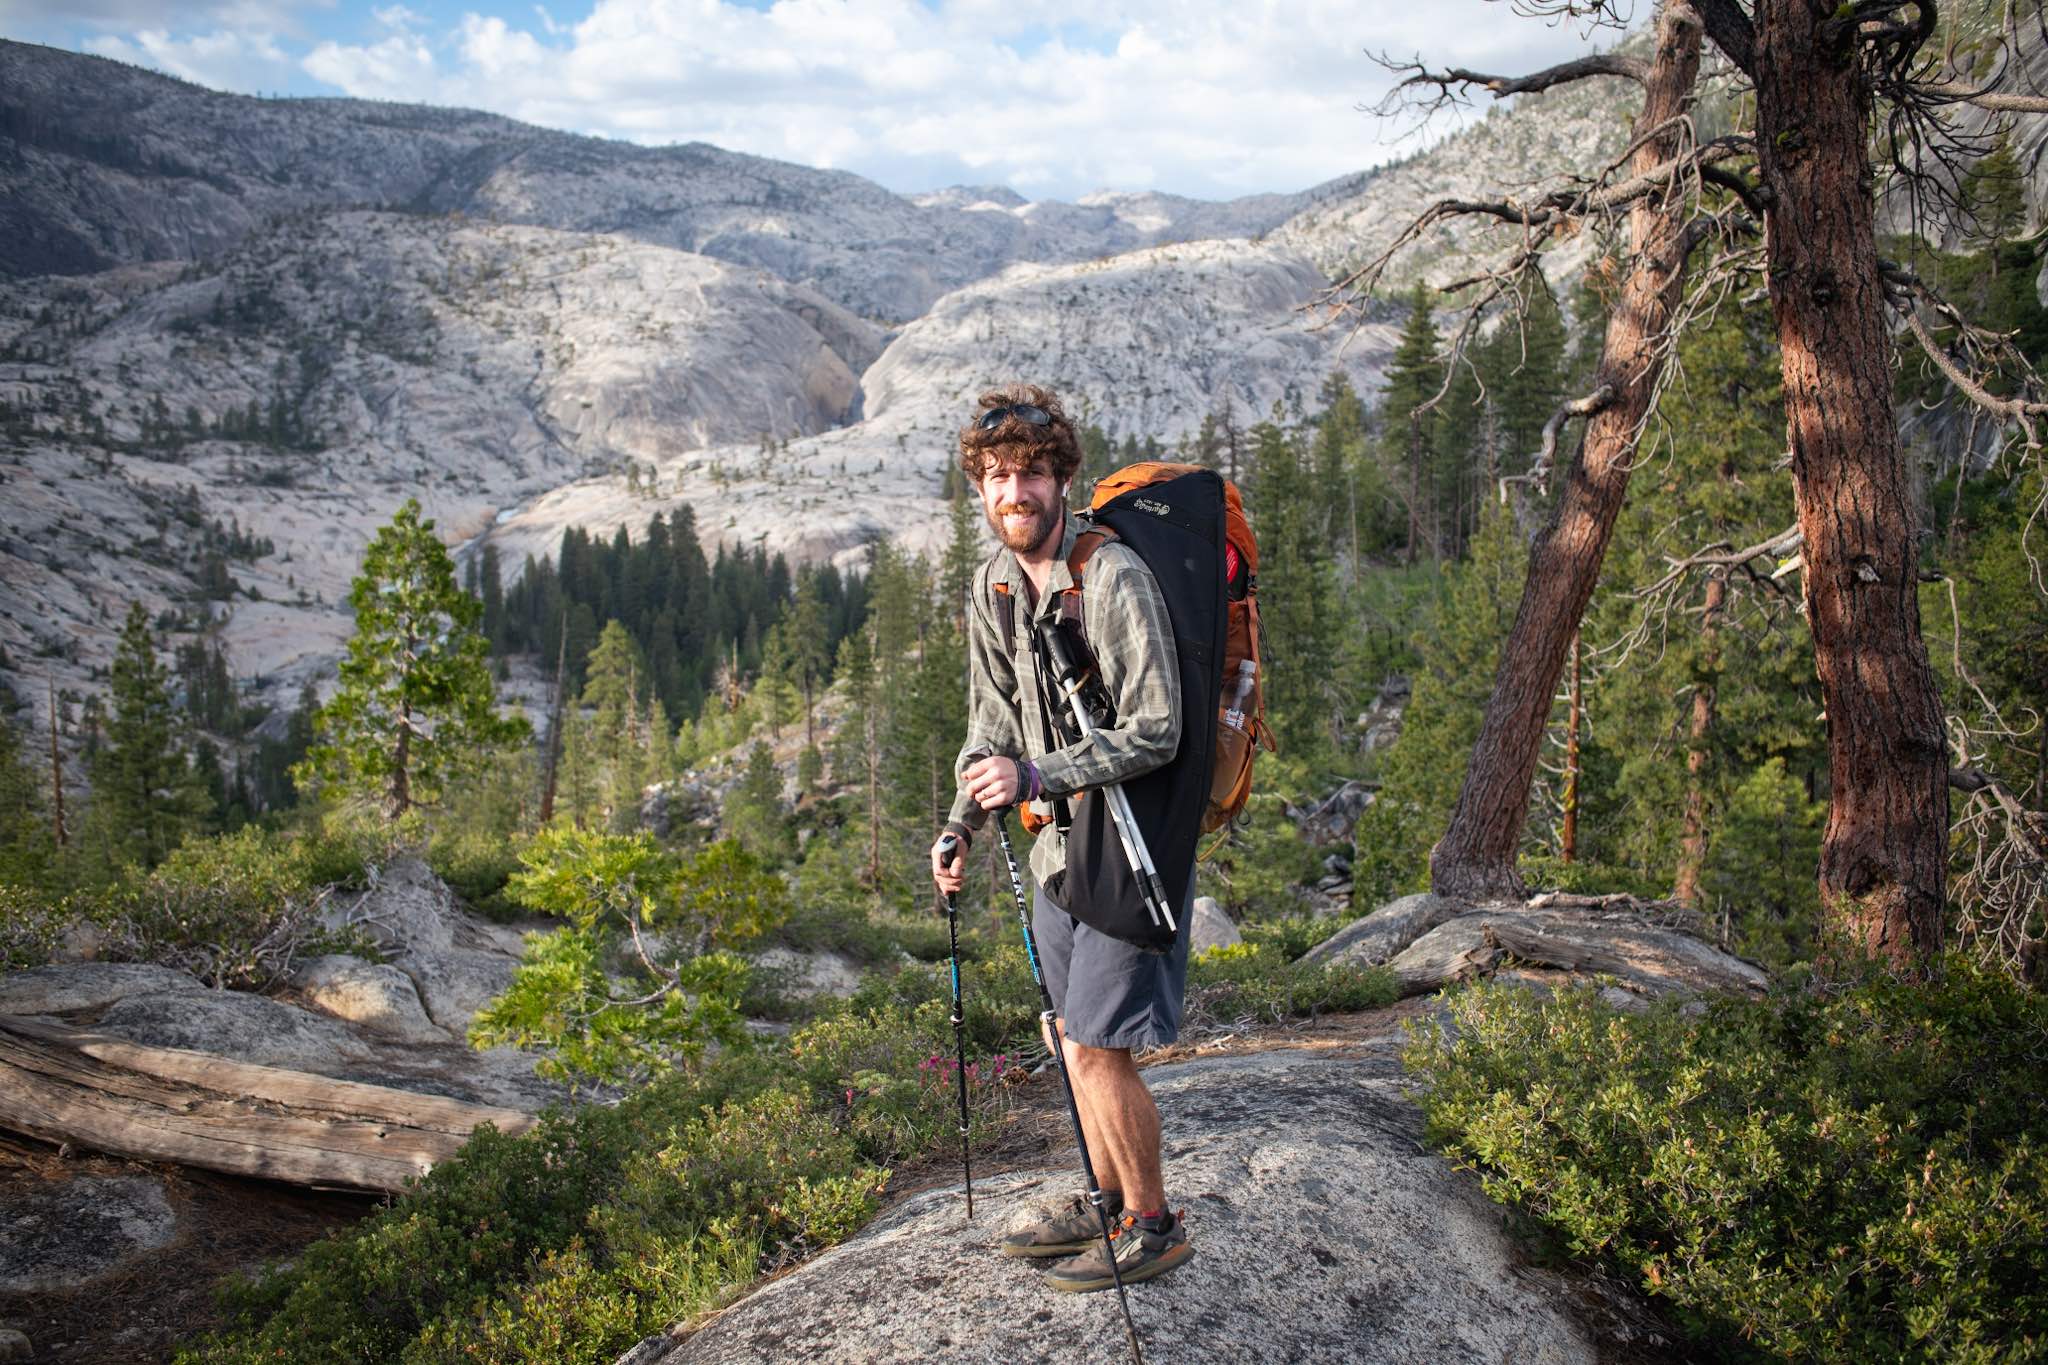
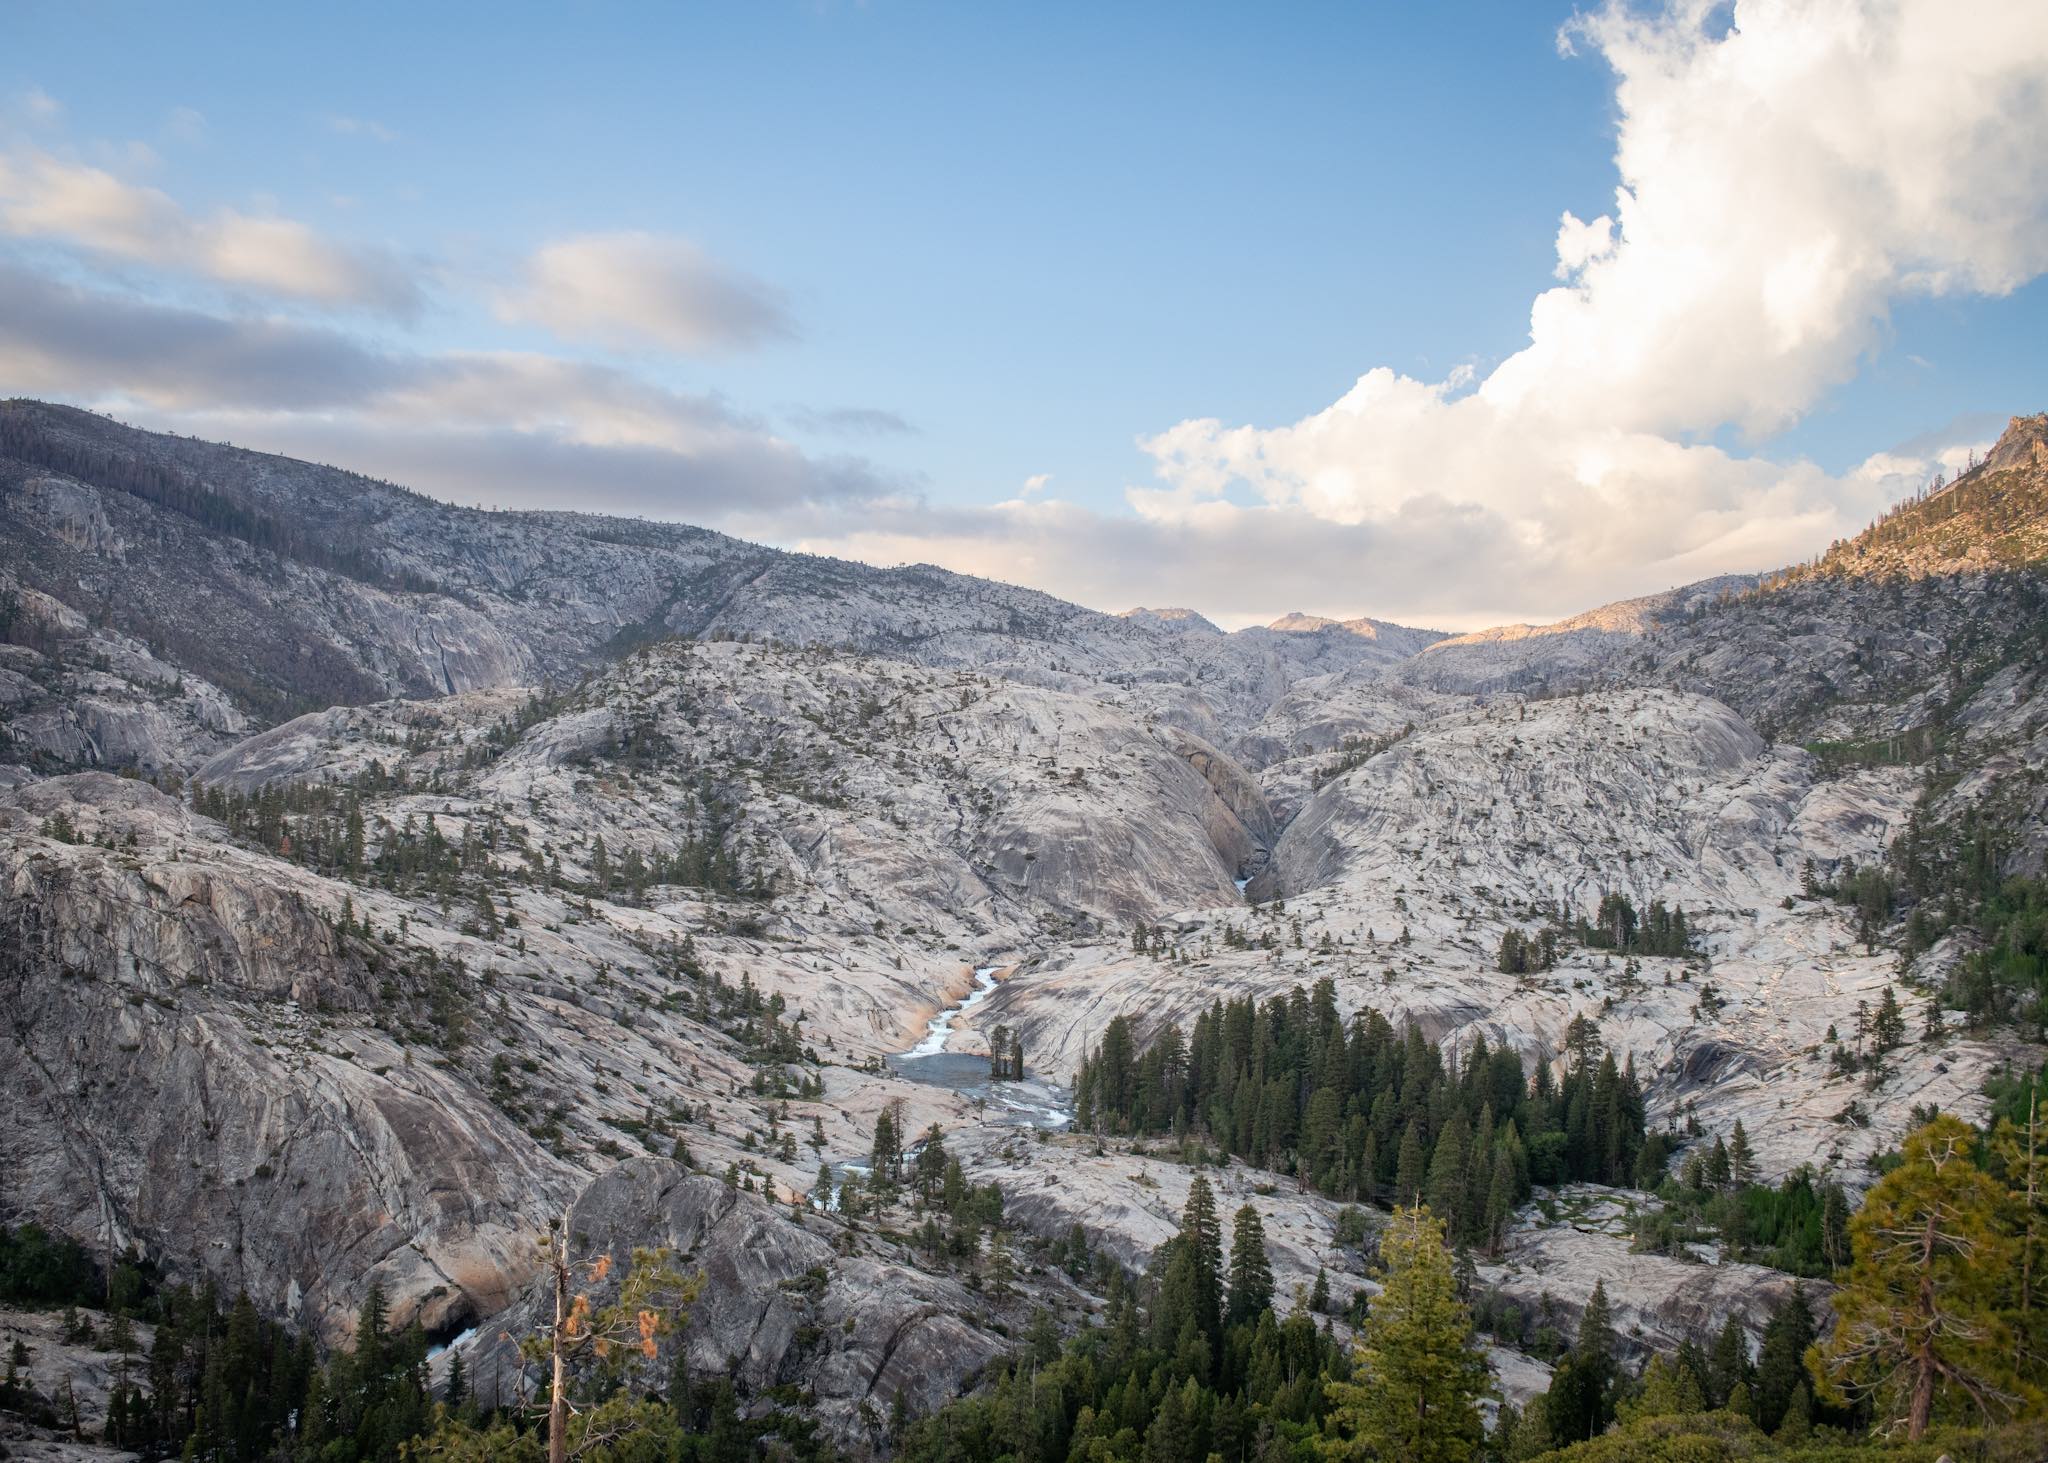
This past Memorial Day Weekend, Margaret and I packed up our bags (including a travel guitar and tin whistle for while at camp) and drove to Cherry Lake for a two-day backpacking trip to Cherry Bomb Gorge. On the way, we had to stop at Groveland Ranger Station to pick up our free wilderness permit. We parked at Shingle Springs Trailhead, which was completely full by the time that we got there, though nearly everyone else were camping at Kibbie Lake. There are very few trails in the area; this keeps the creek very remote and difficult to access even with it’s proximity to Yosemite. Additionally, there aren’t very many resources online about how best to access the creek, but I did find a blog post from Leor Pantilat that speculated that you could take Kibbie Ridge Trail up to Lookout Point and then descending off trail down to Flintstones Camp just downstream of Cherry Bomb Gorge. This seemed reasonable on the map as there honestly aren’t many options to descend to the river that don’t end up cliffed out. Kibbie Ridge Trail was not the most picturesque and very fire damaged; there was a large fire back in 2013, but I don’t know if it’s still recovering from that or if there’s been a more recent one. It was generally easy to follow, though there were sections that were overgrown with a very spiky bush whose goal was clearly to make sure that I regretted wearing shorts. Lookout Point was our first view of the creek and our planned campsite, but we still needed to descend about 1500ft off trail to get there. We move about a quarter mile further north before dropping into the gully. The bushwhack was incredibly steep and dense, and there weren’t many options for reroutes that we could find as we had cliffs on either side. I will admit that I was not having a good time through this section and thought that the climb out would be even more miserable (Margaret handled this much better, as expected). We finally broke out onto the granite after descending about 1000ft, now around 6250ft elevation. On top of the dome, we had a great view of Cherry Bomb Gorge and the Teacups, and even could see the outflow of Dead Bear Falls.
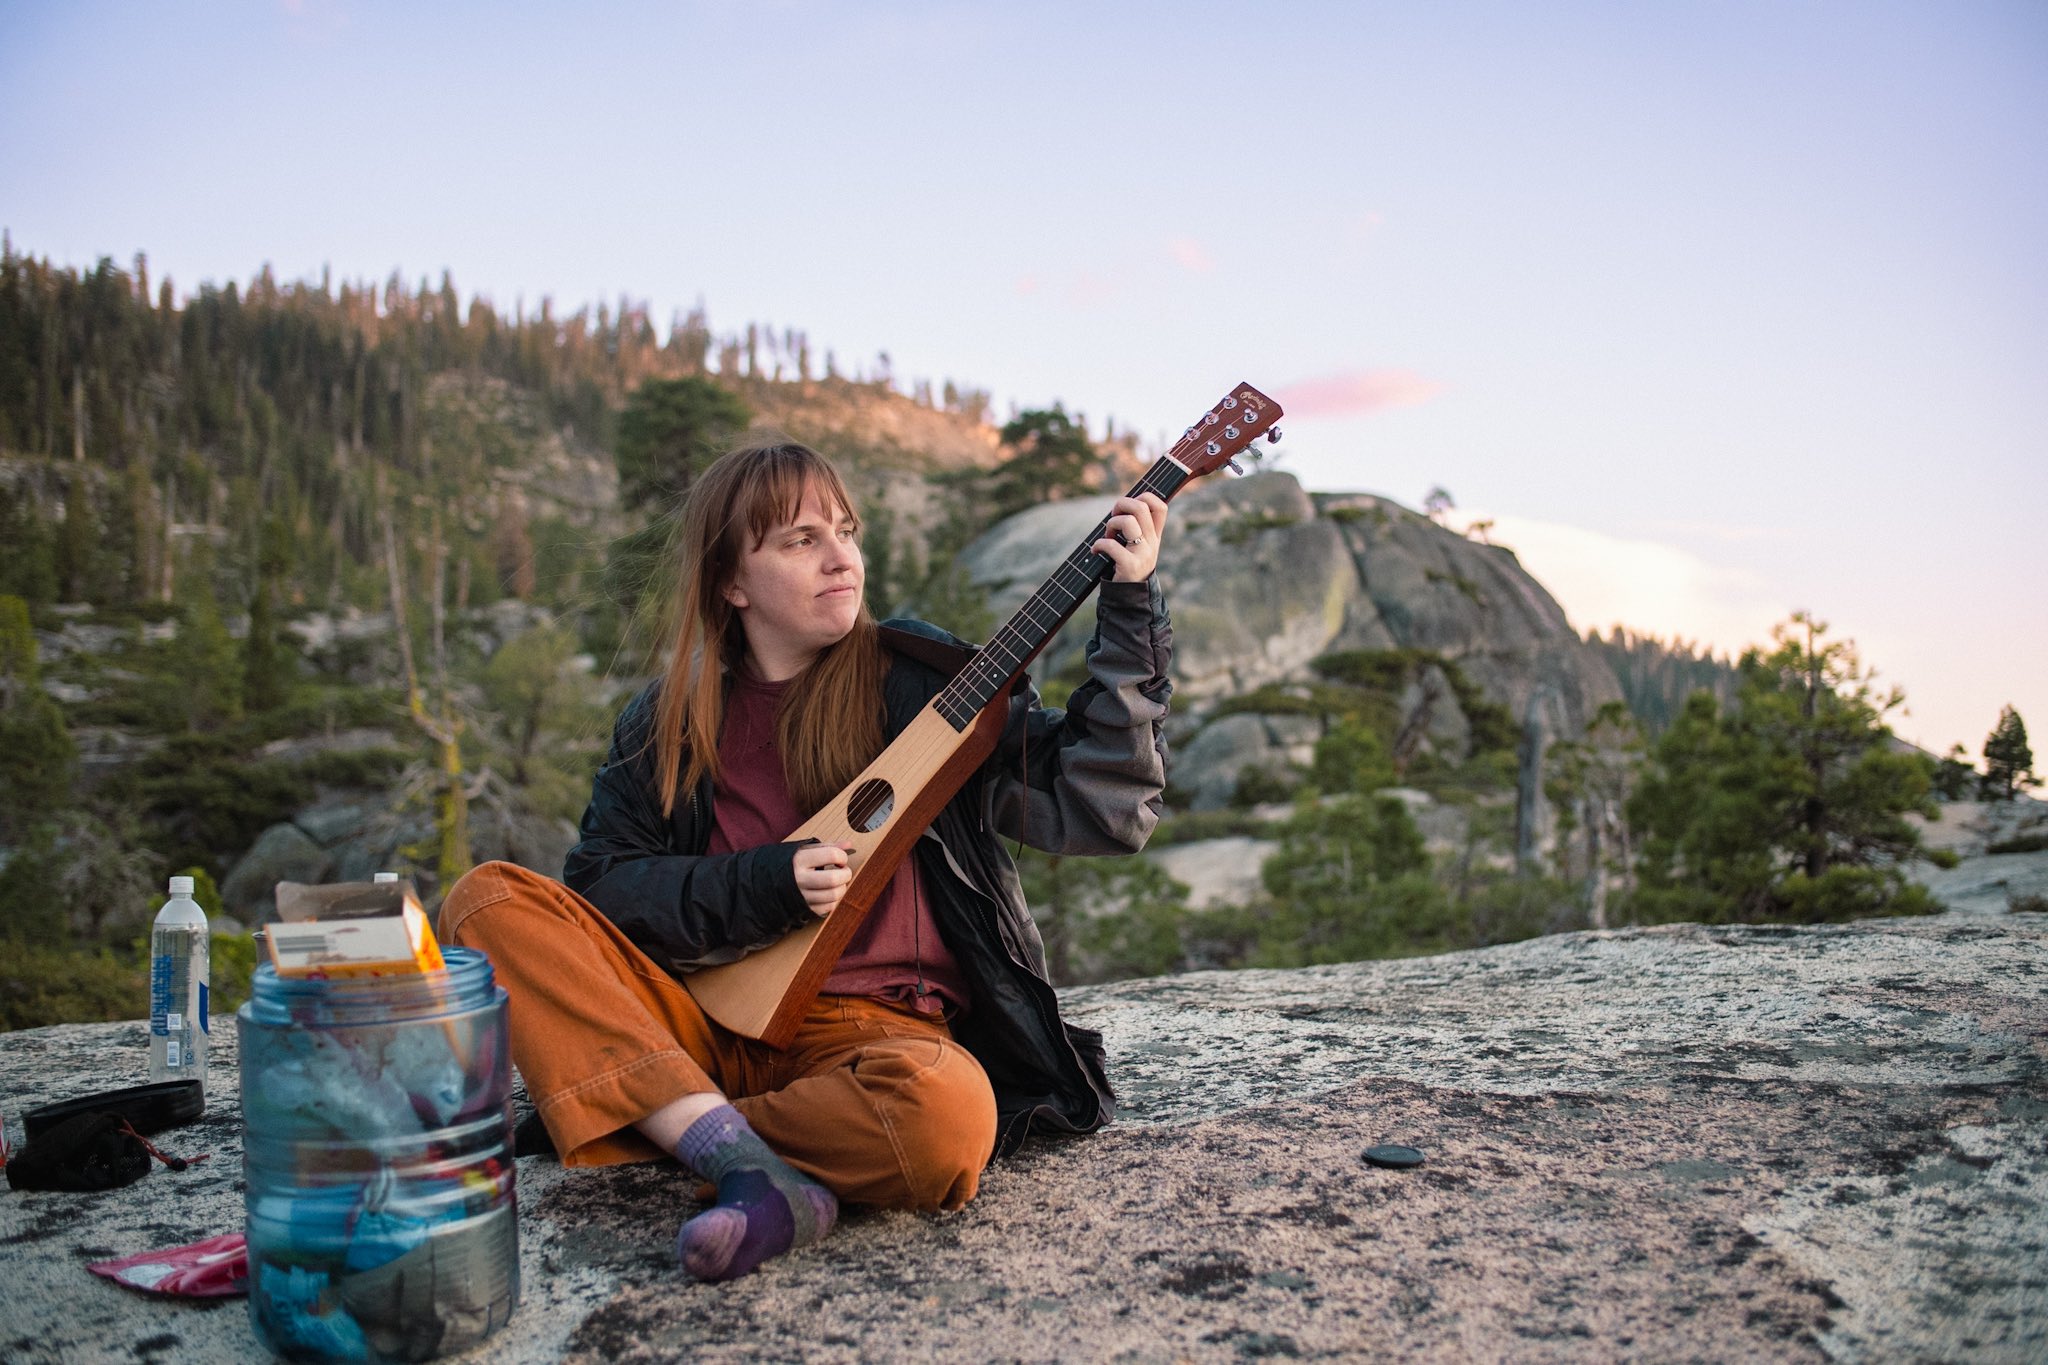
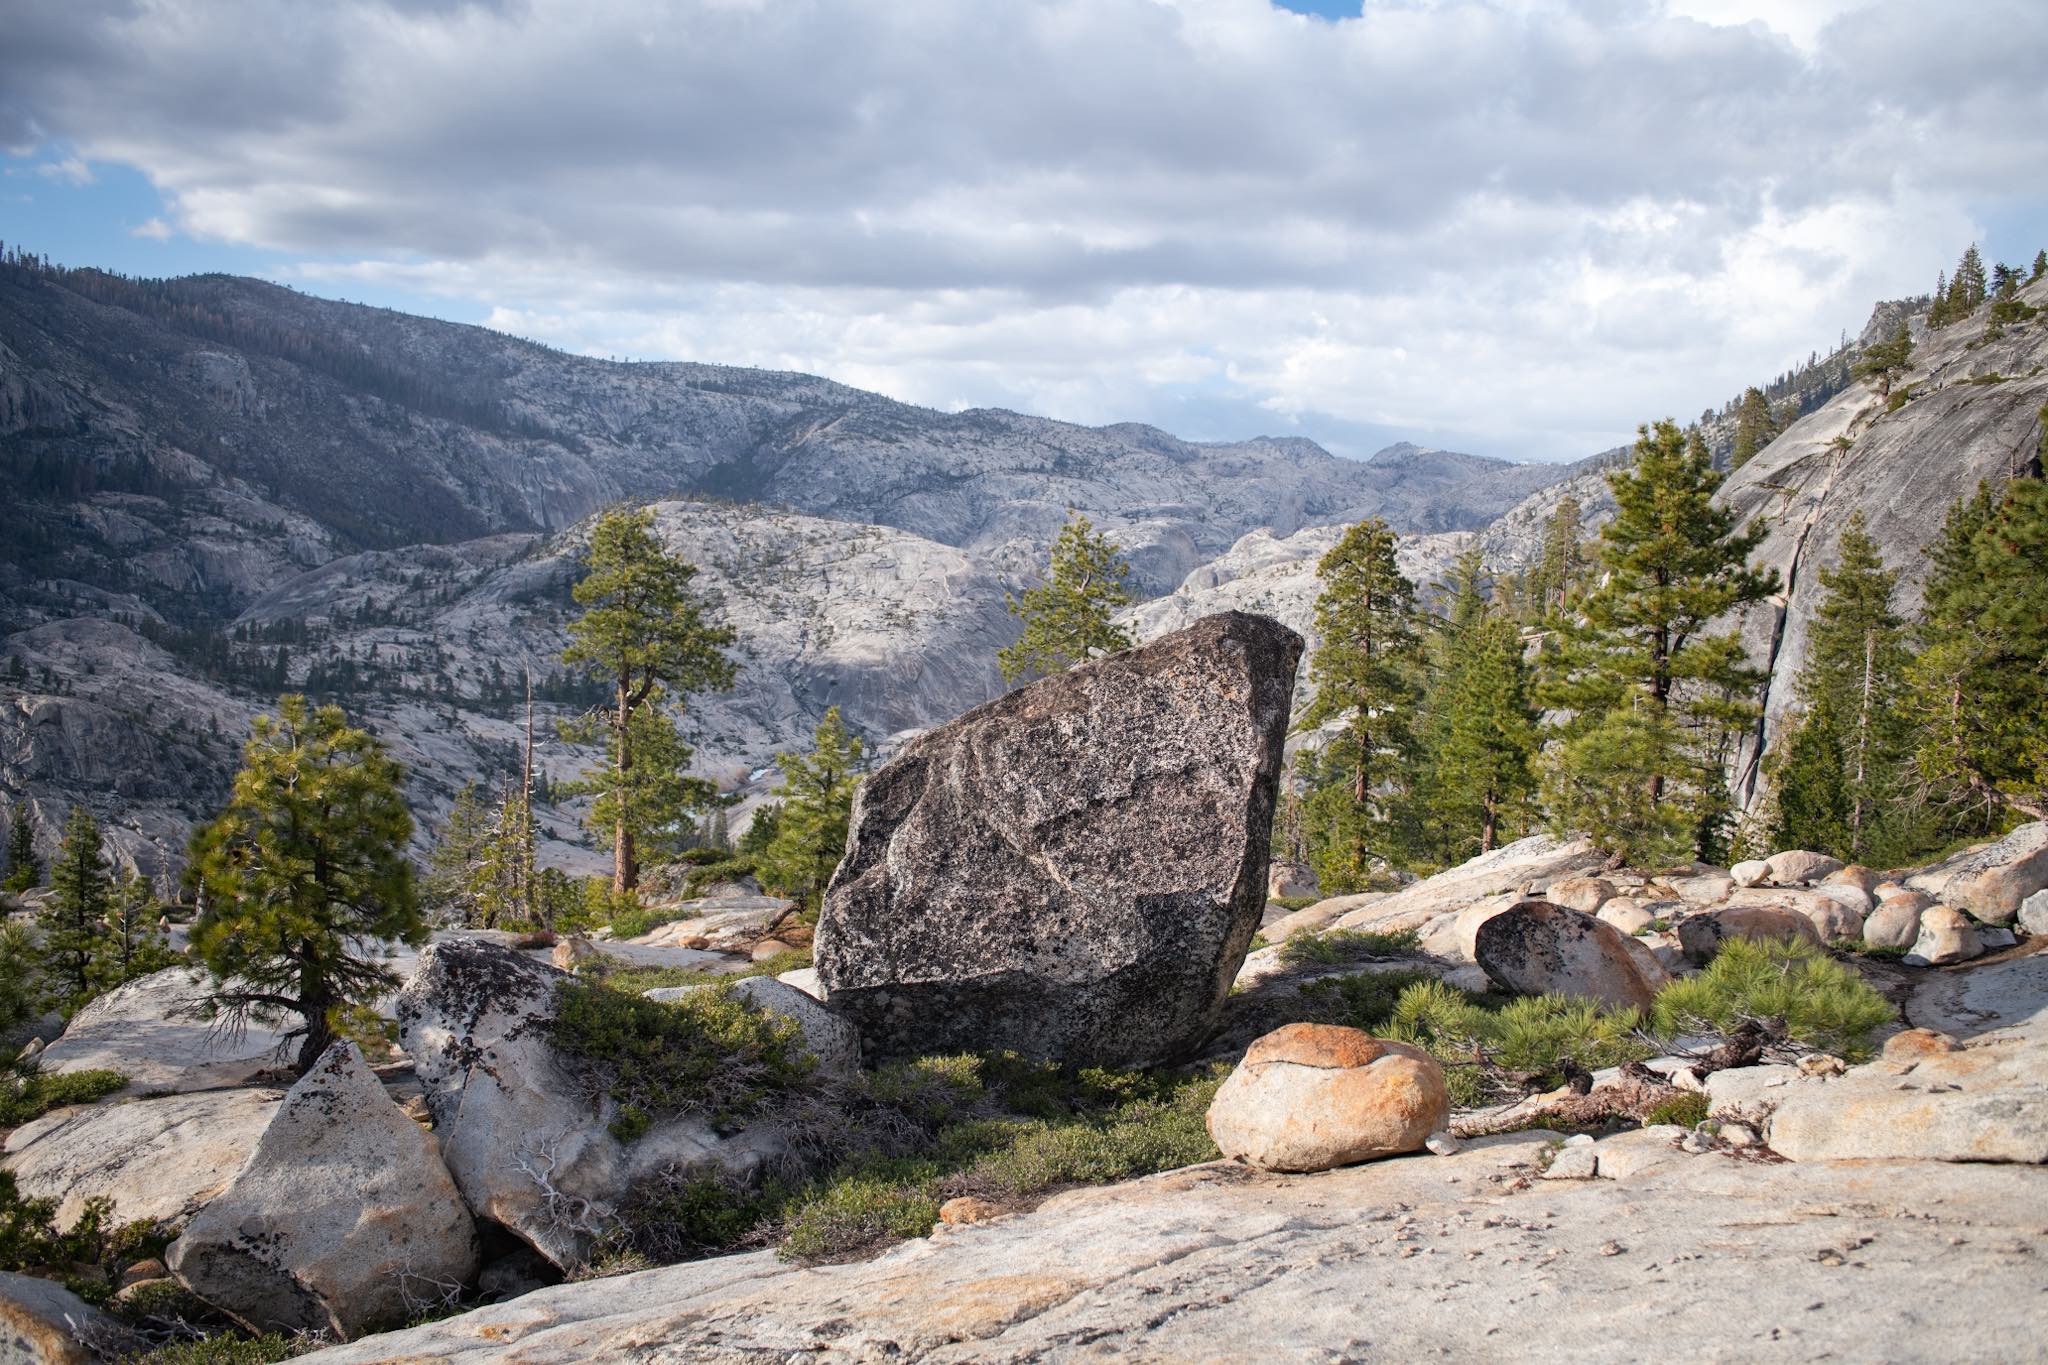
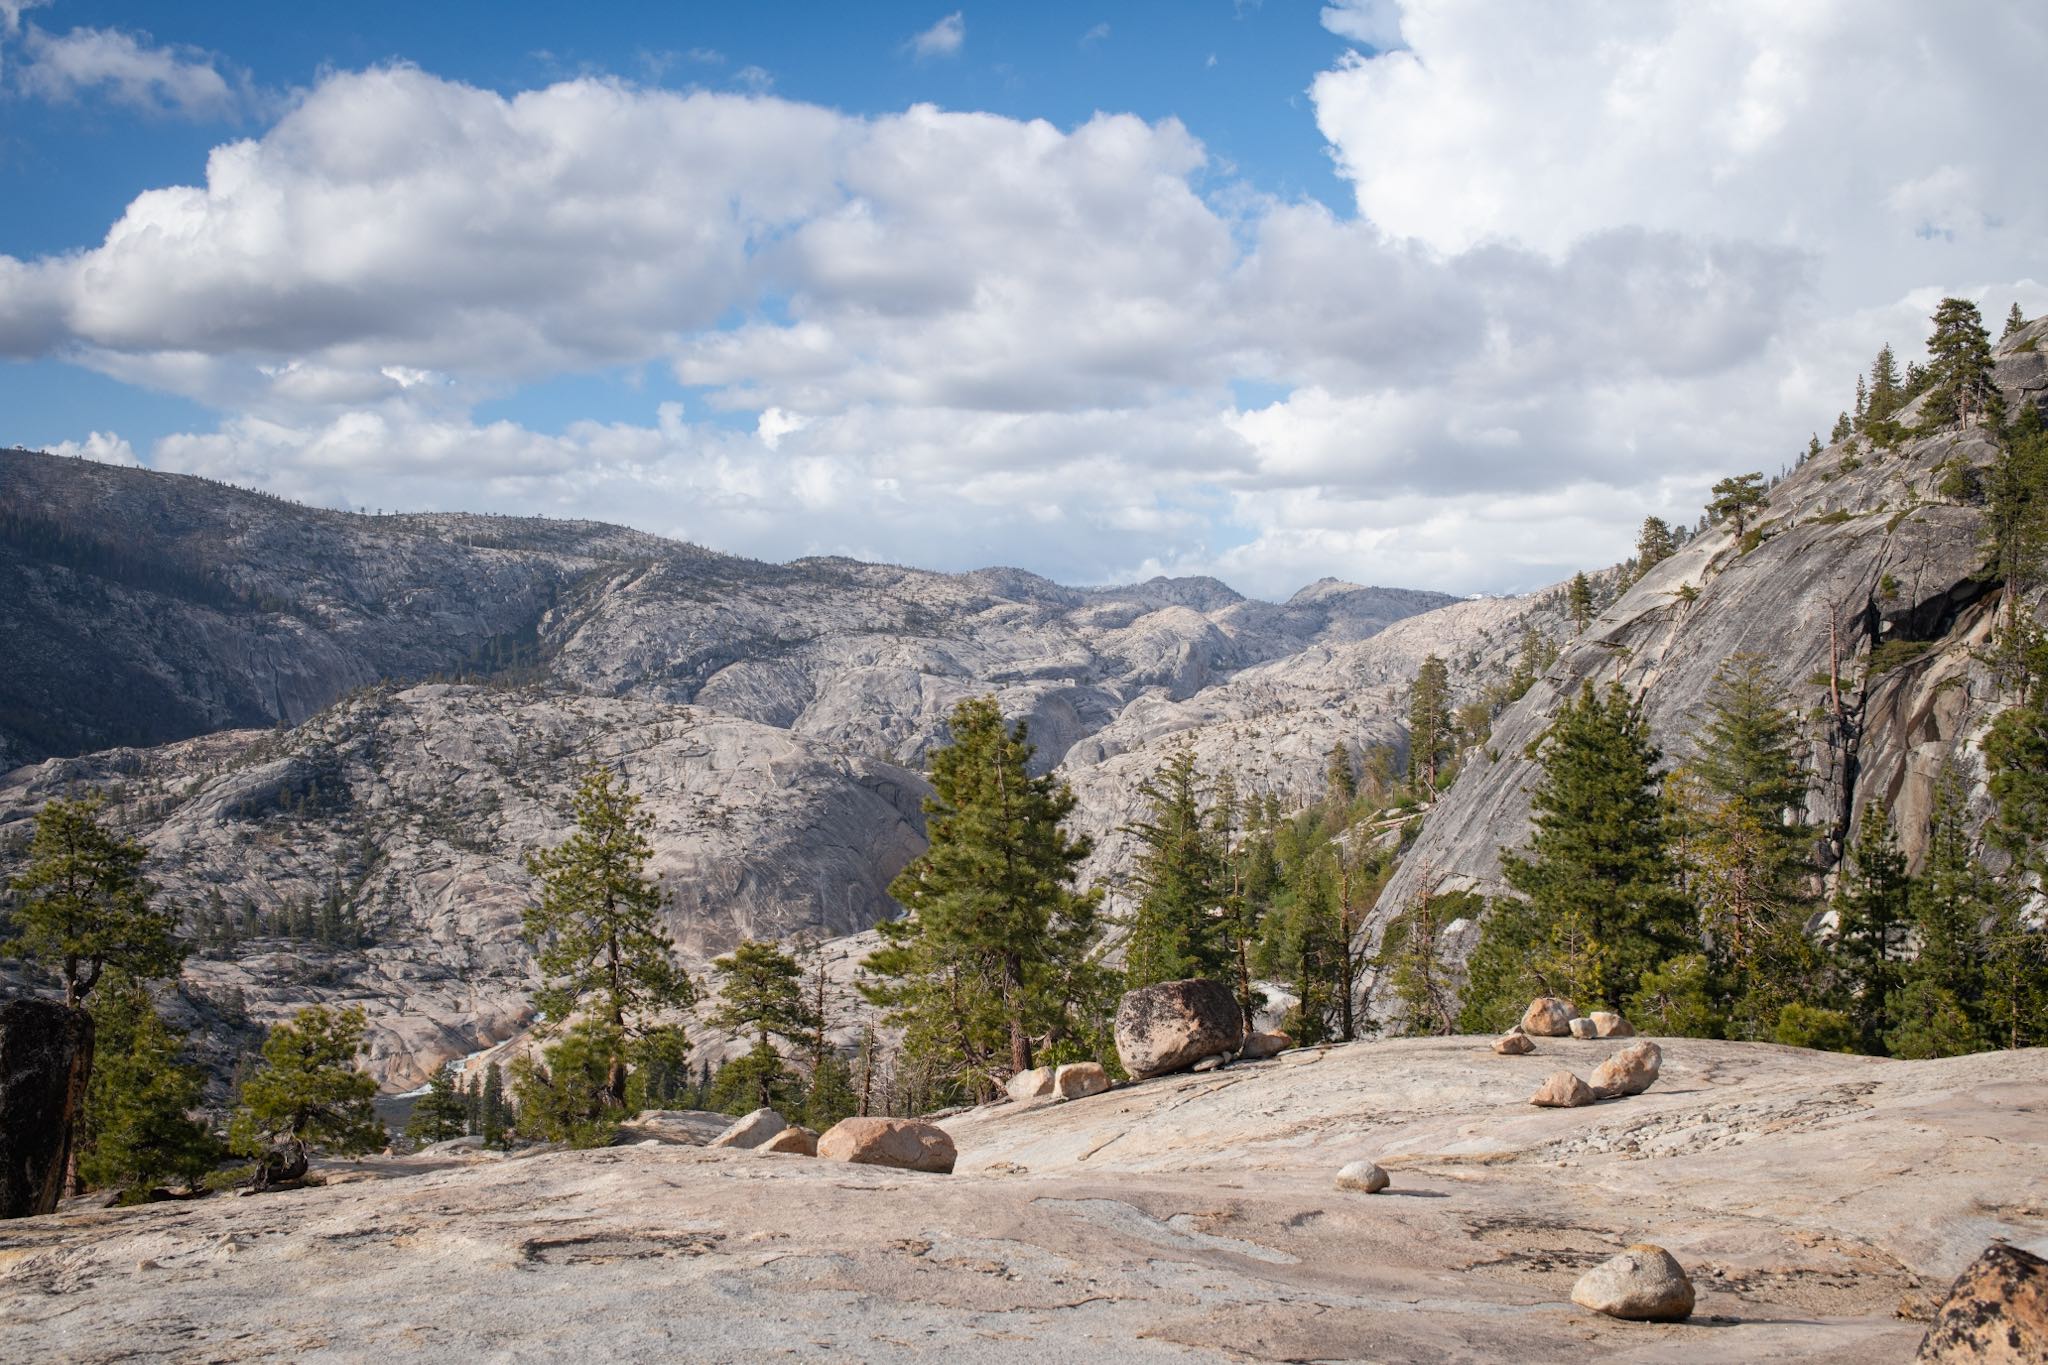
We decided to camp on the dome rather than continue to Flintstones Camp to give us more time to relax in camp and make the next day easier. The final bushwhack to the river did look steep and relatively dense, but there is more exposed granite that you might be able to connect to avoid the brunt of it.
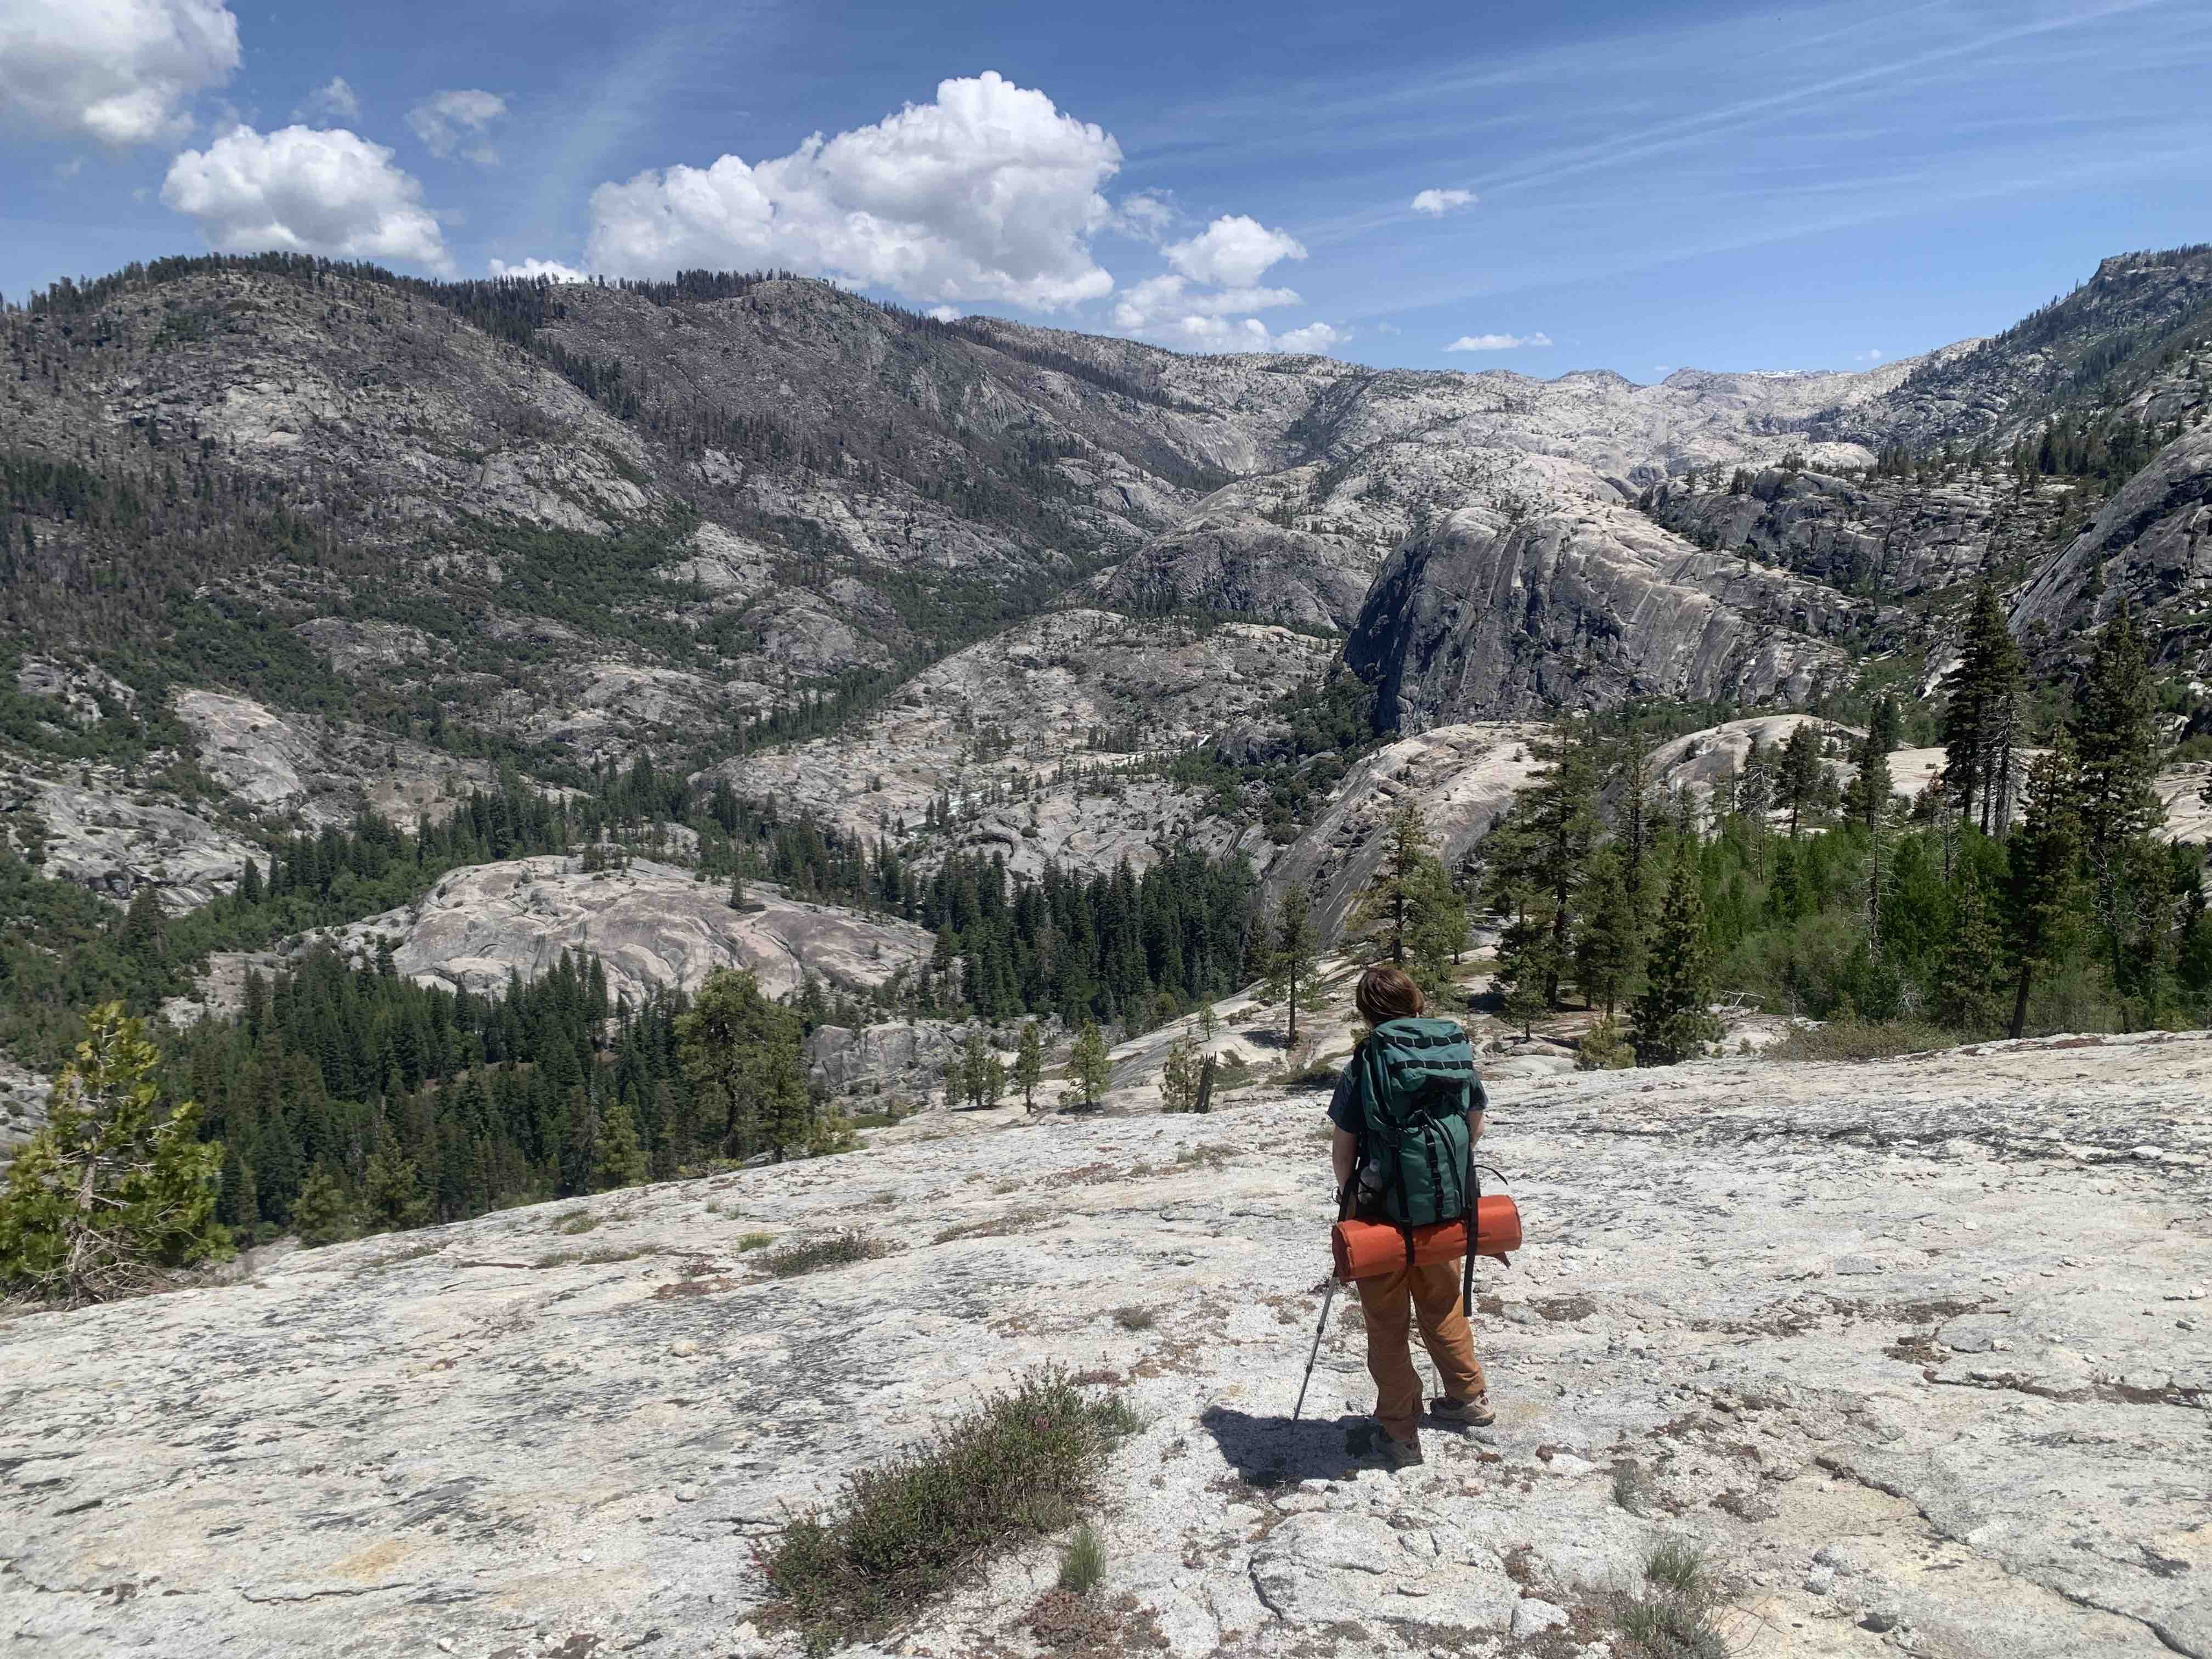
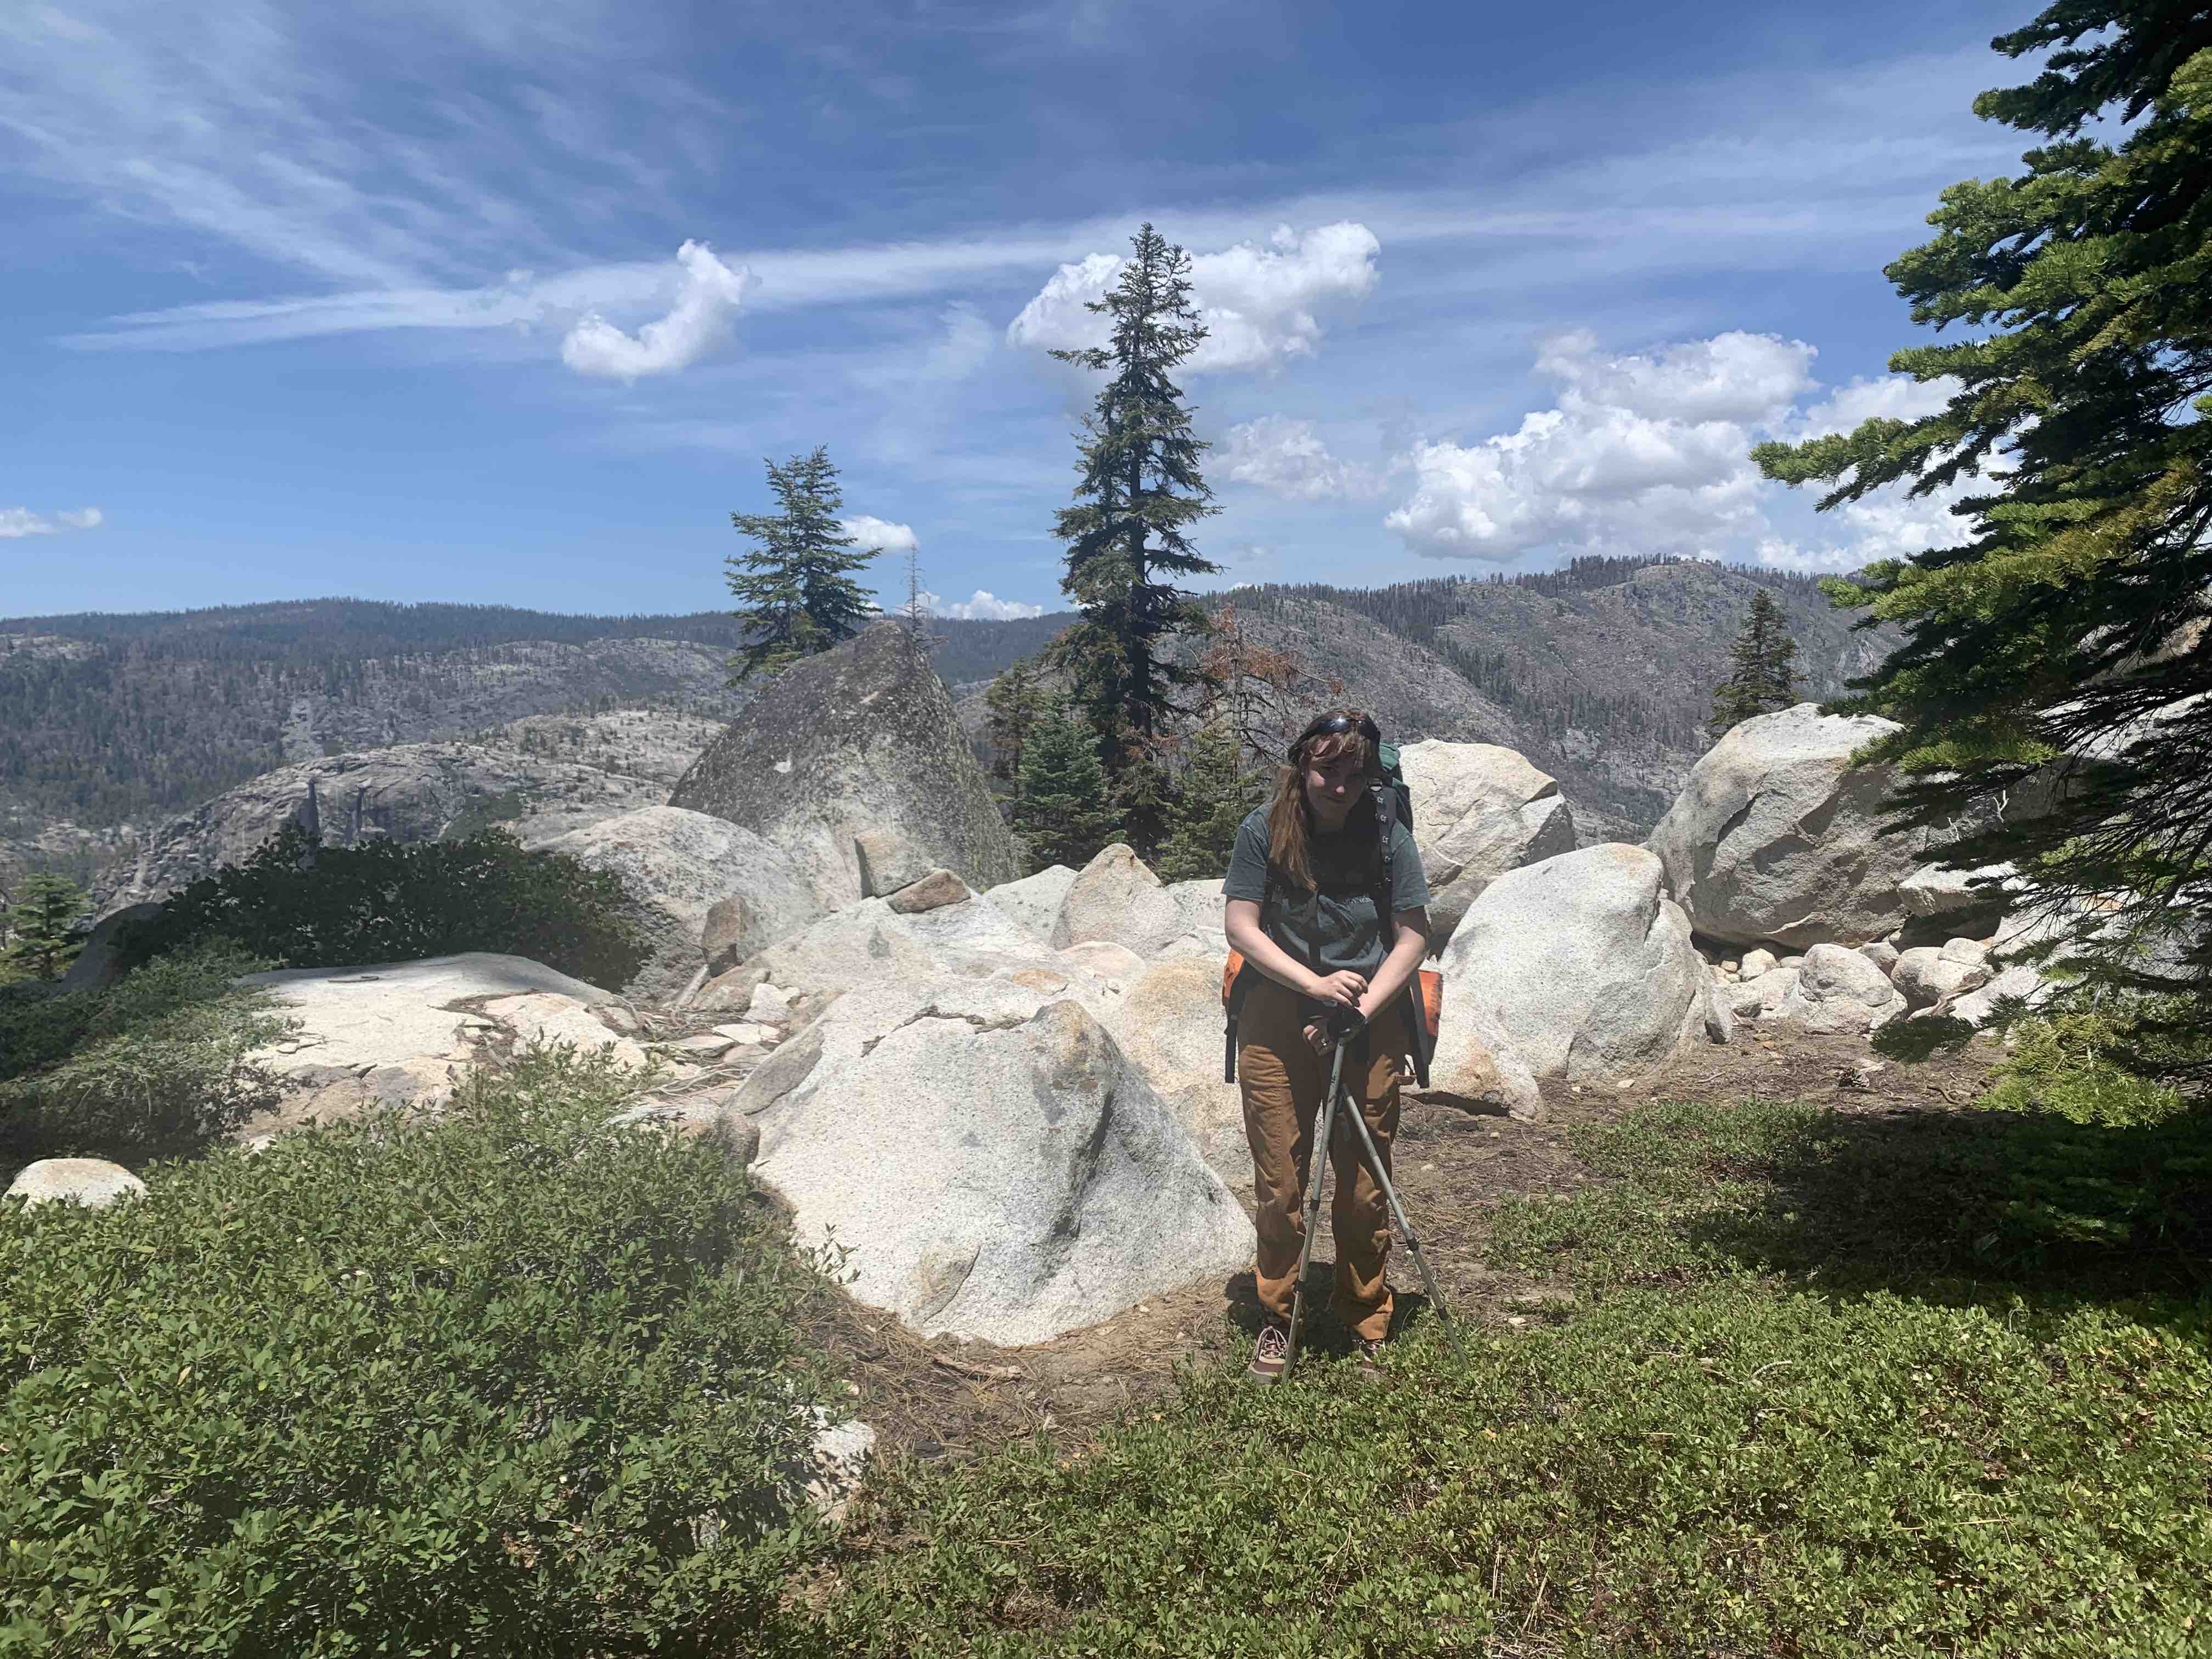
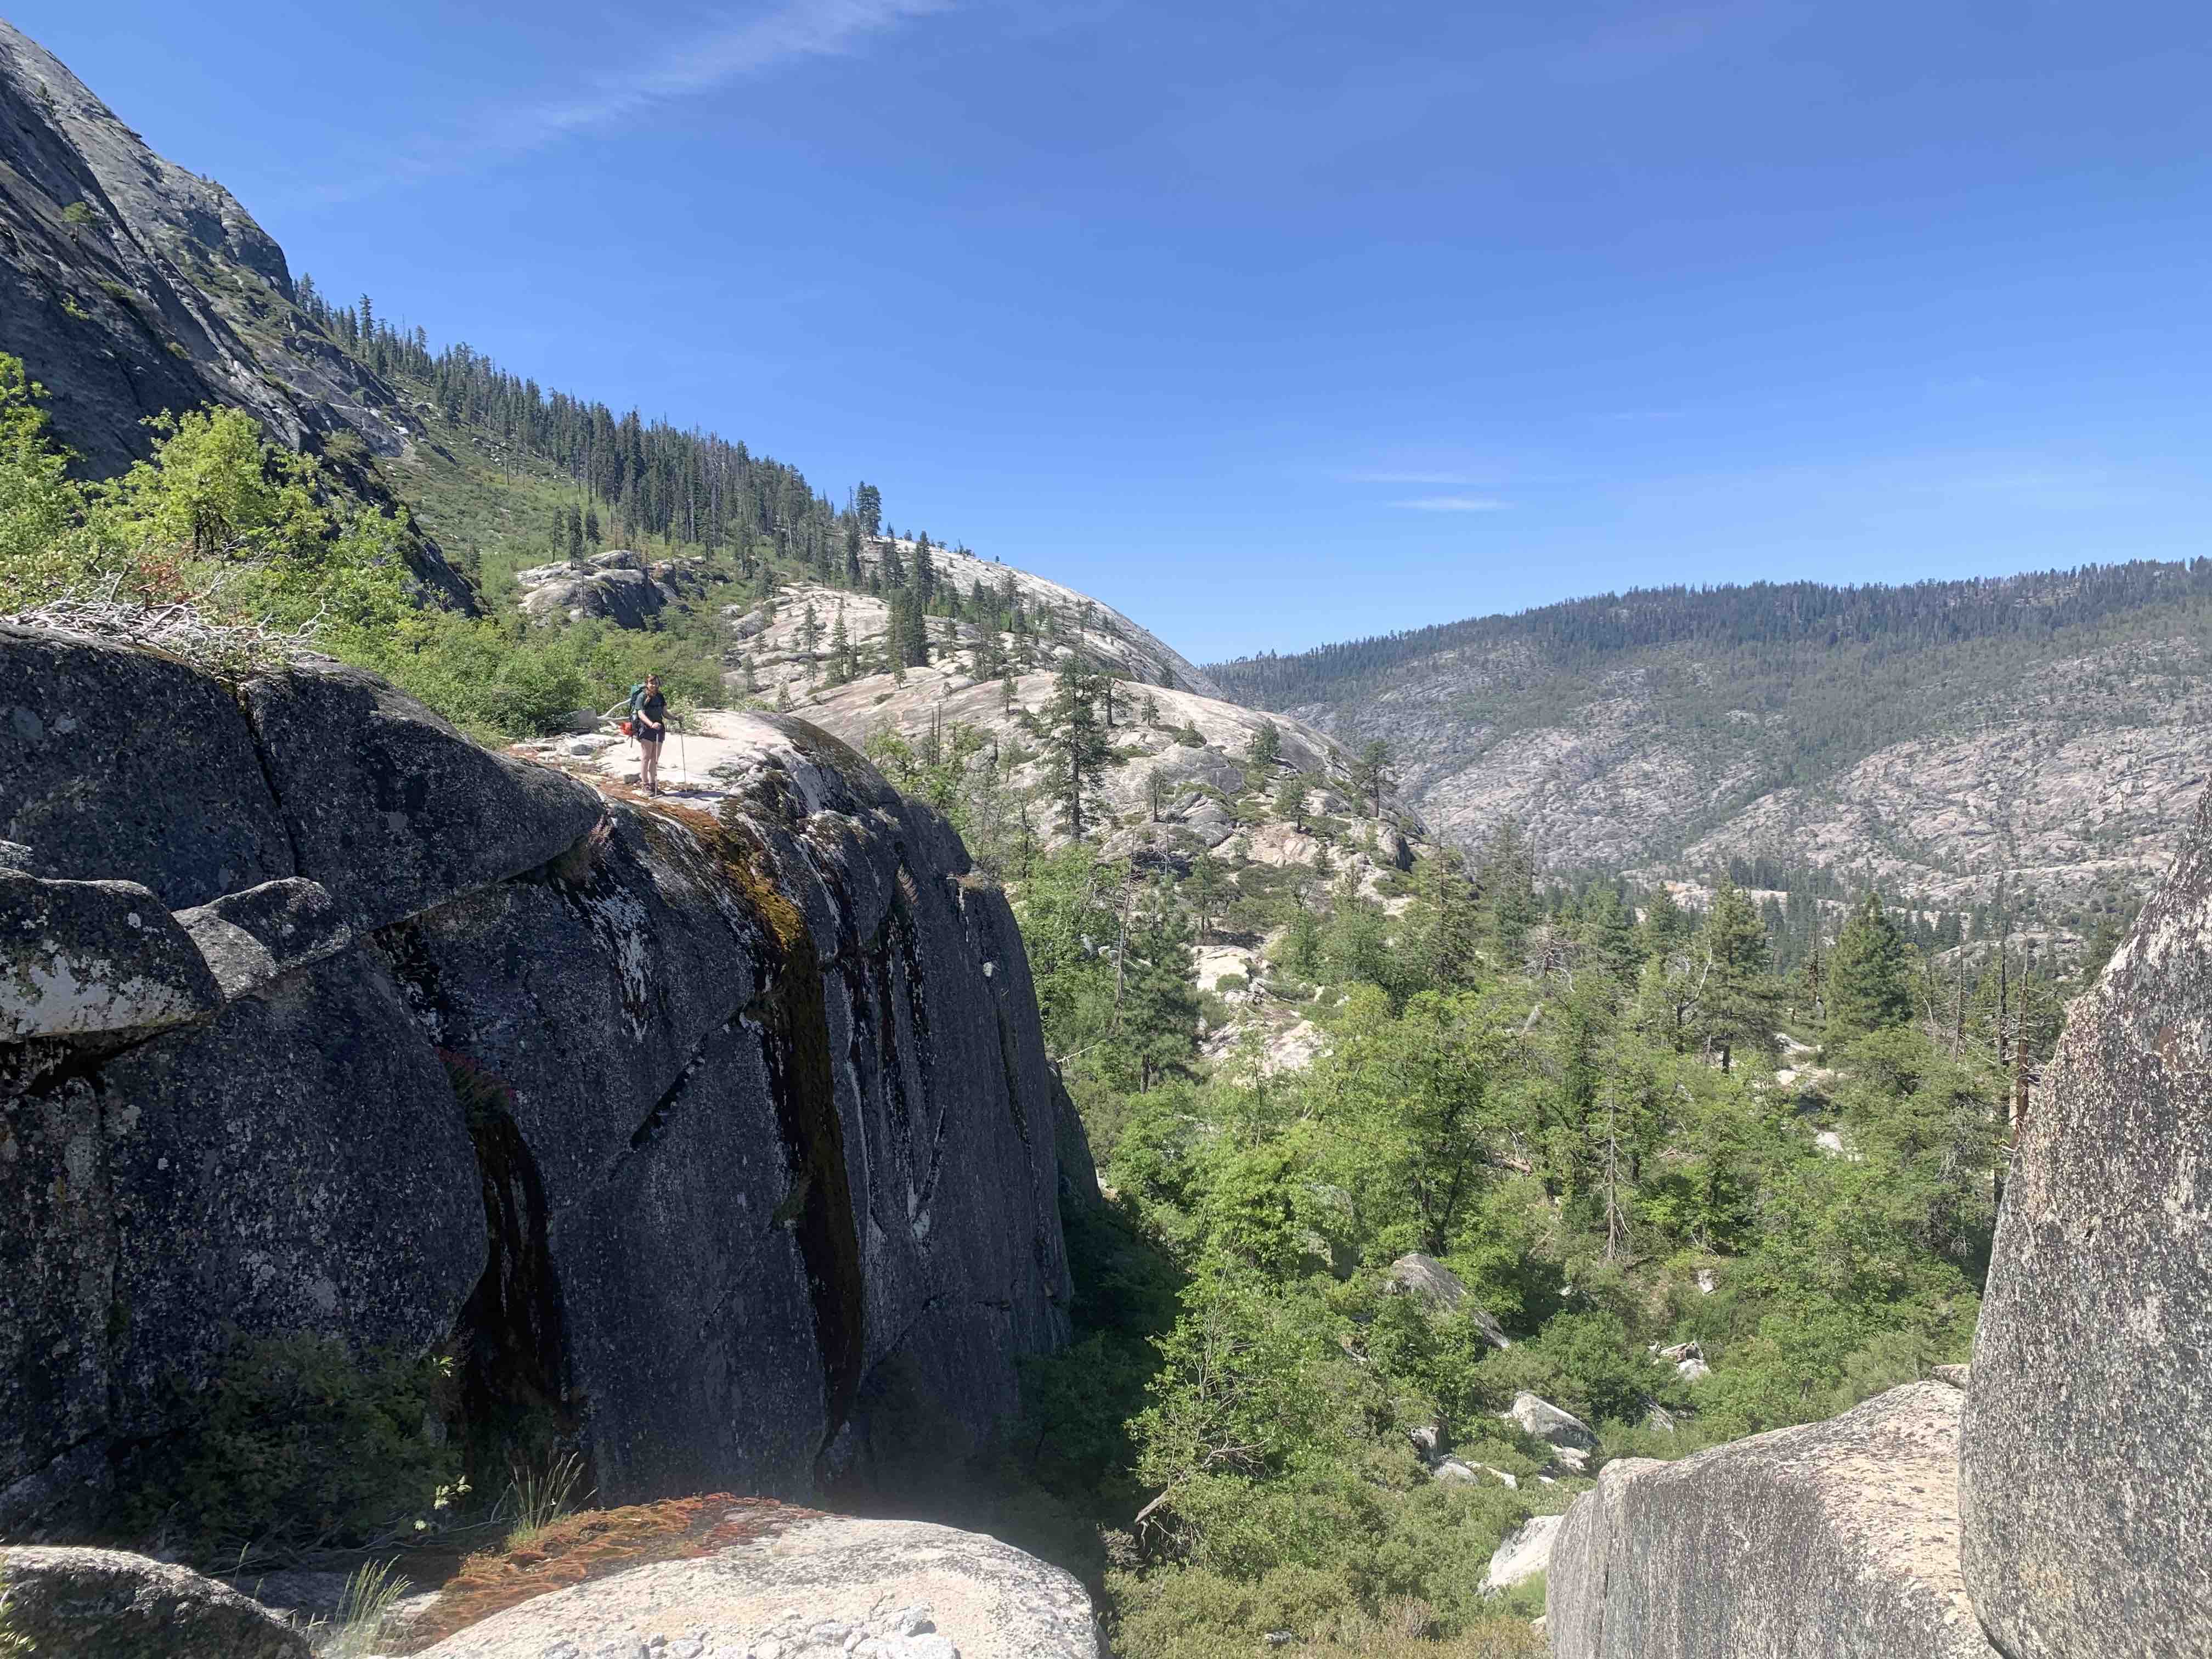
While looking around on the dome, I noticed an alternative exit route up out of the canyon that climbed underneath Lookout Point and avoided the majority of bushwhacking. I had seen this on the map previously but was concerned that it didn’t have good access to the river (still unknown). Margaret was up for giving it a try, and so the next morning, we packed up camp and started the traverse down and over to the start of the new climb. Along the traverse, the granite divides into two large plateaus with increasingly an large drop from one to the next as you descend. Because of this, it was important to stick closer to the cliff edge and ensure that you end up on the lower plateau to avoid getting cliffed out. We made this mistake at first, but it was a pretty easy backtrack to get on the correct path. From there, we scrambled down a shoot (see picture of Margaret standing on the lower plateau on the southern side of the shoot) that dropped to a small creek that was very easy to cross and likely wouldn’t be flowing later in the season.
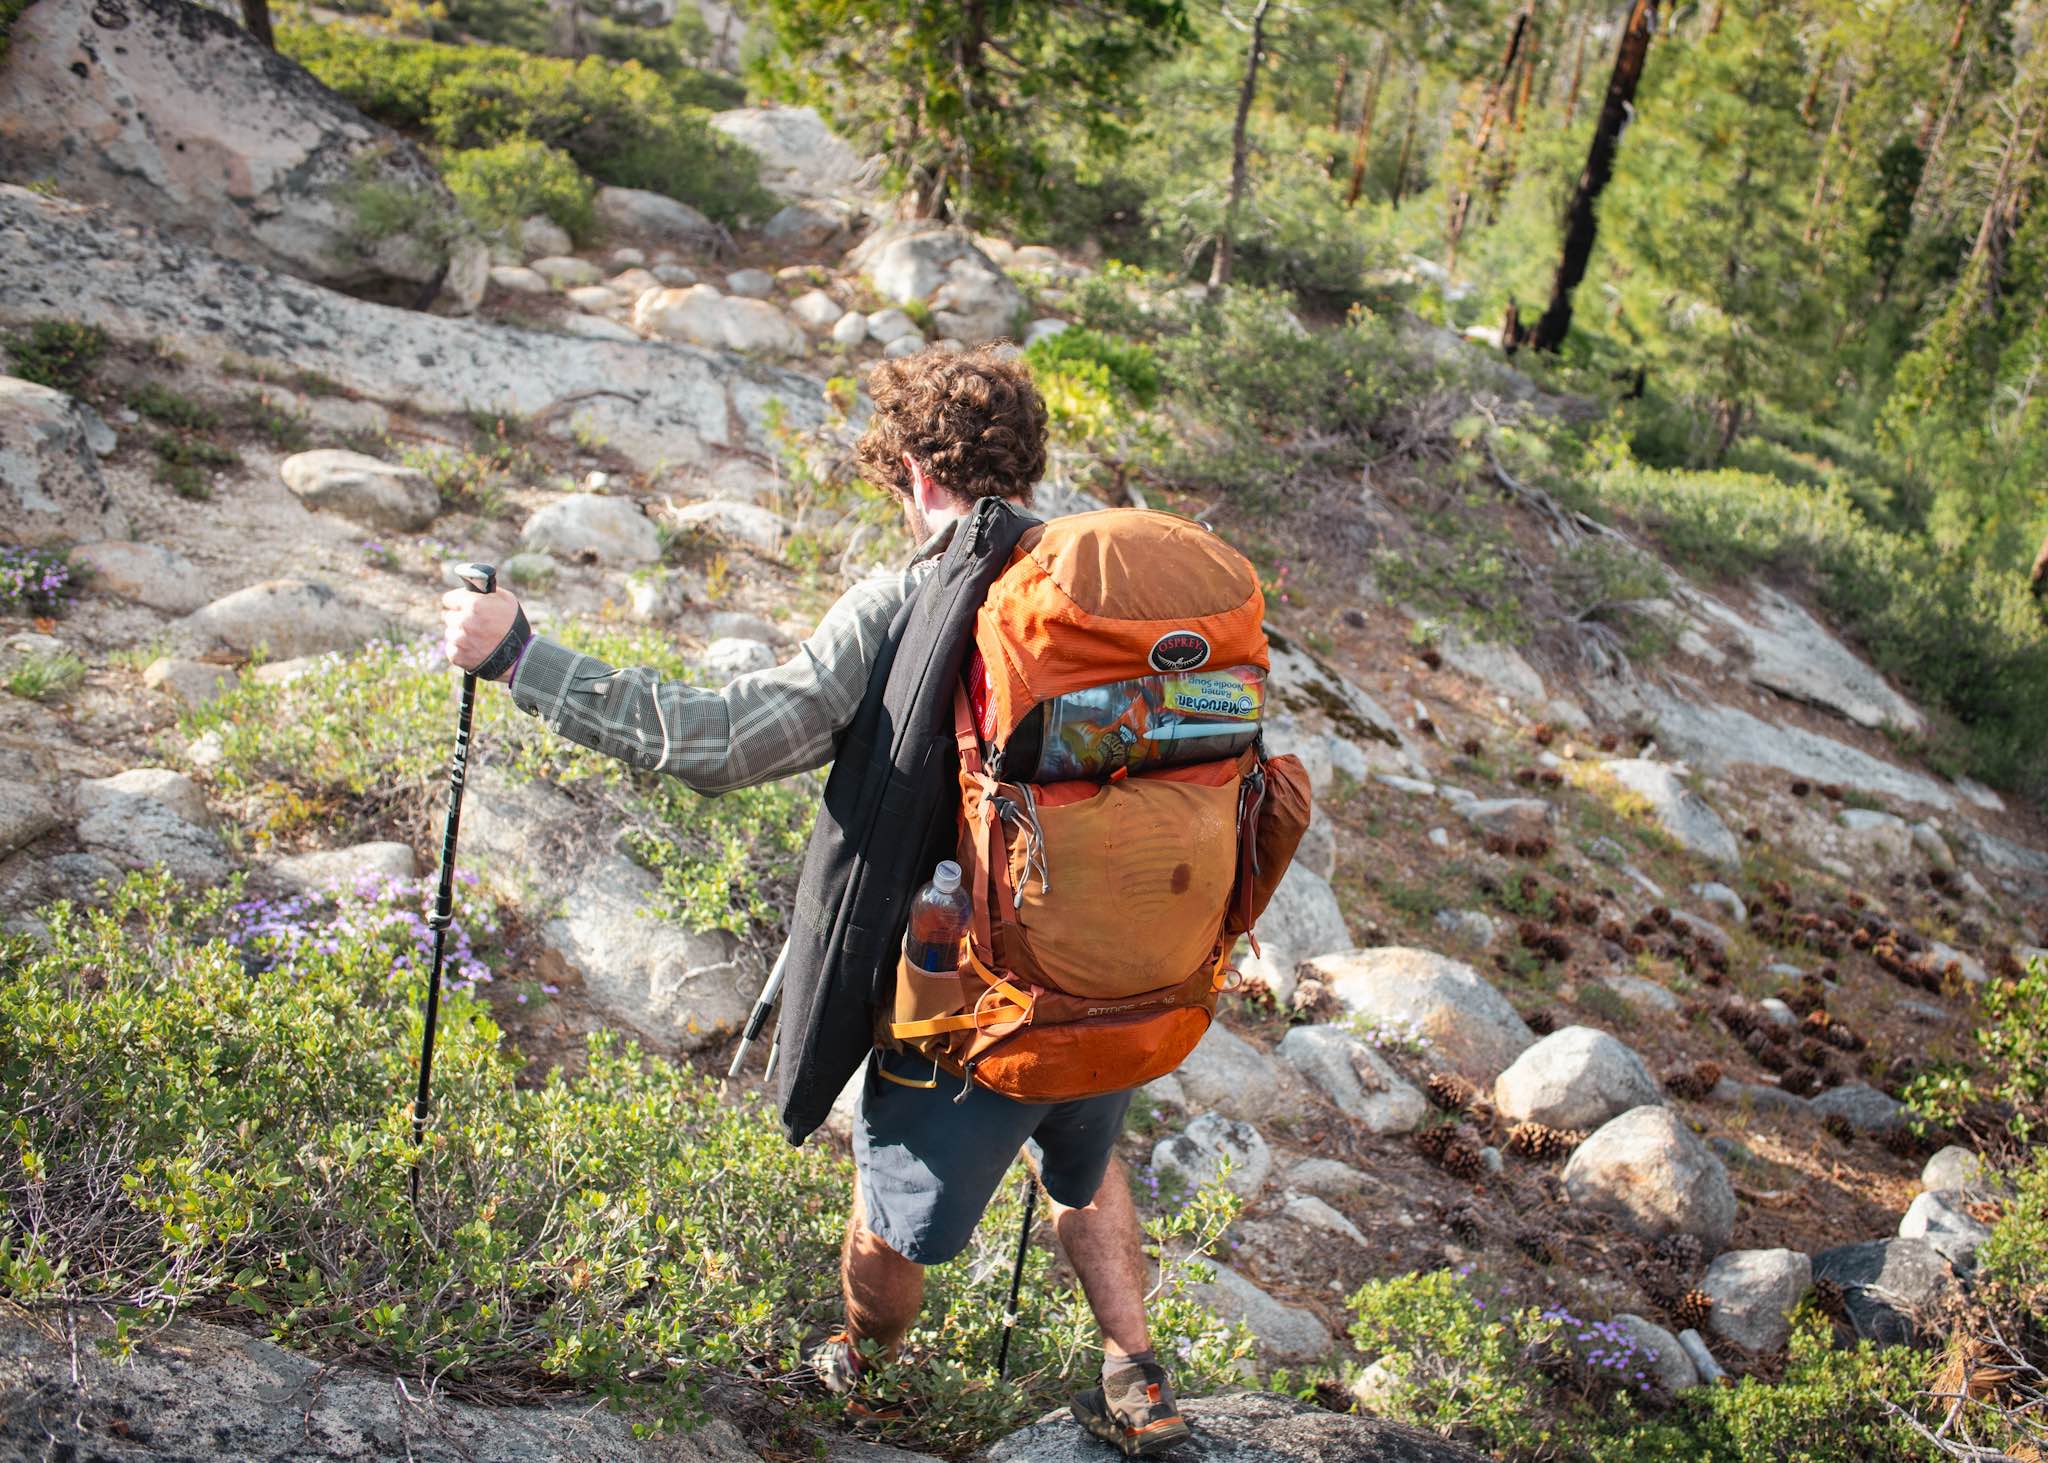
The shoot was the most technical part of the whole trip but still did not require Margaret or I to remove our packs in order to get down. It did feel wrong to have descended another 500ft from where we camped when we were supposed to be climbing out of the canyon, but once at the base of the climb, it was very straight forward to hike the granite all the way to the tree line around 6250ft. The final bit of bushwhacking was much easier than the descent bushwhack as the trees were relatively sparse as long as we stayed a bit towards the east. Whenever it started getting dense, we moved to climbers’ left and things cleared up. Eventually, the trees gave way to a boulder field, which was easy to route through until it suddenly flattened out at the top of the ridge. We finally reconnected with the Kibbie Ridge Trail and made our way back to Shingle Springs Trailhead. The final excitement of the trip was a rattlesnake on the trail that spooked us and then disappeared into the bushes before I could get a picture.
There’s a reason why this canyon is so remote. Though the mileage and elevation gain of our trip was relatively modest, the route finding and bushwhacking was intense. But that is also one of the reasons why it is so rewarding. I can also see a return trip being much easier now that we’ve worked out the beginning, though I’m sure that there are plenty of challenges down at creek level as well. In retrospect, I think a three-day backpacking trip would have been perfect as it would have given us a full day to explore the canyon without having to worry about doing the climb out on the same day. If you are planning to do a similar trip, I’d recommend going with someone who has been before as this will help avoid some of the headaches we ran into. You will want to make sure that you have good weather; the exposed granite could turn into an oven when its hot or be dangerously slick if there’s rain or ice. I’ve linked an interactive map with the GPX track of our trip (though the tracking failed during the climb out, causing the straight line up to Kibbie Ridge Trail). I’ve also marked the locations of some of the named rapids in the gorge; this can be crossed referenced with A Wet State’s description for kayakers.